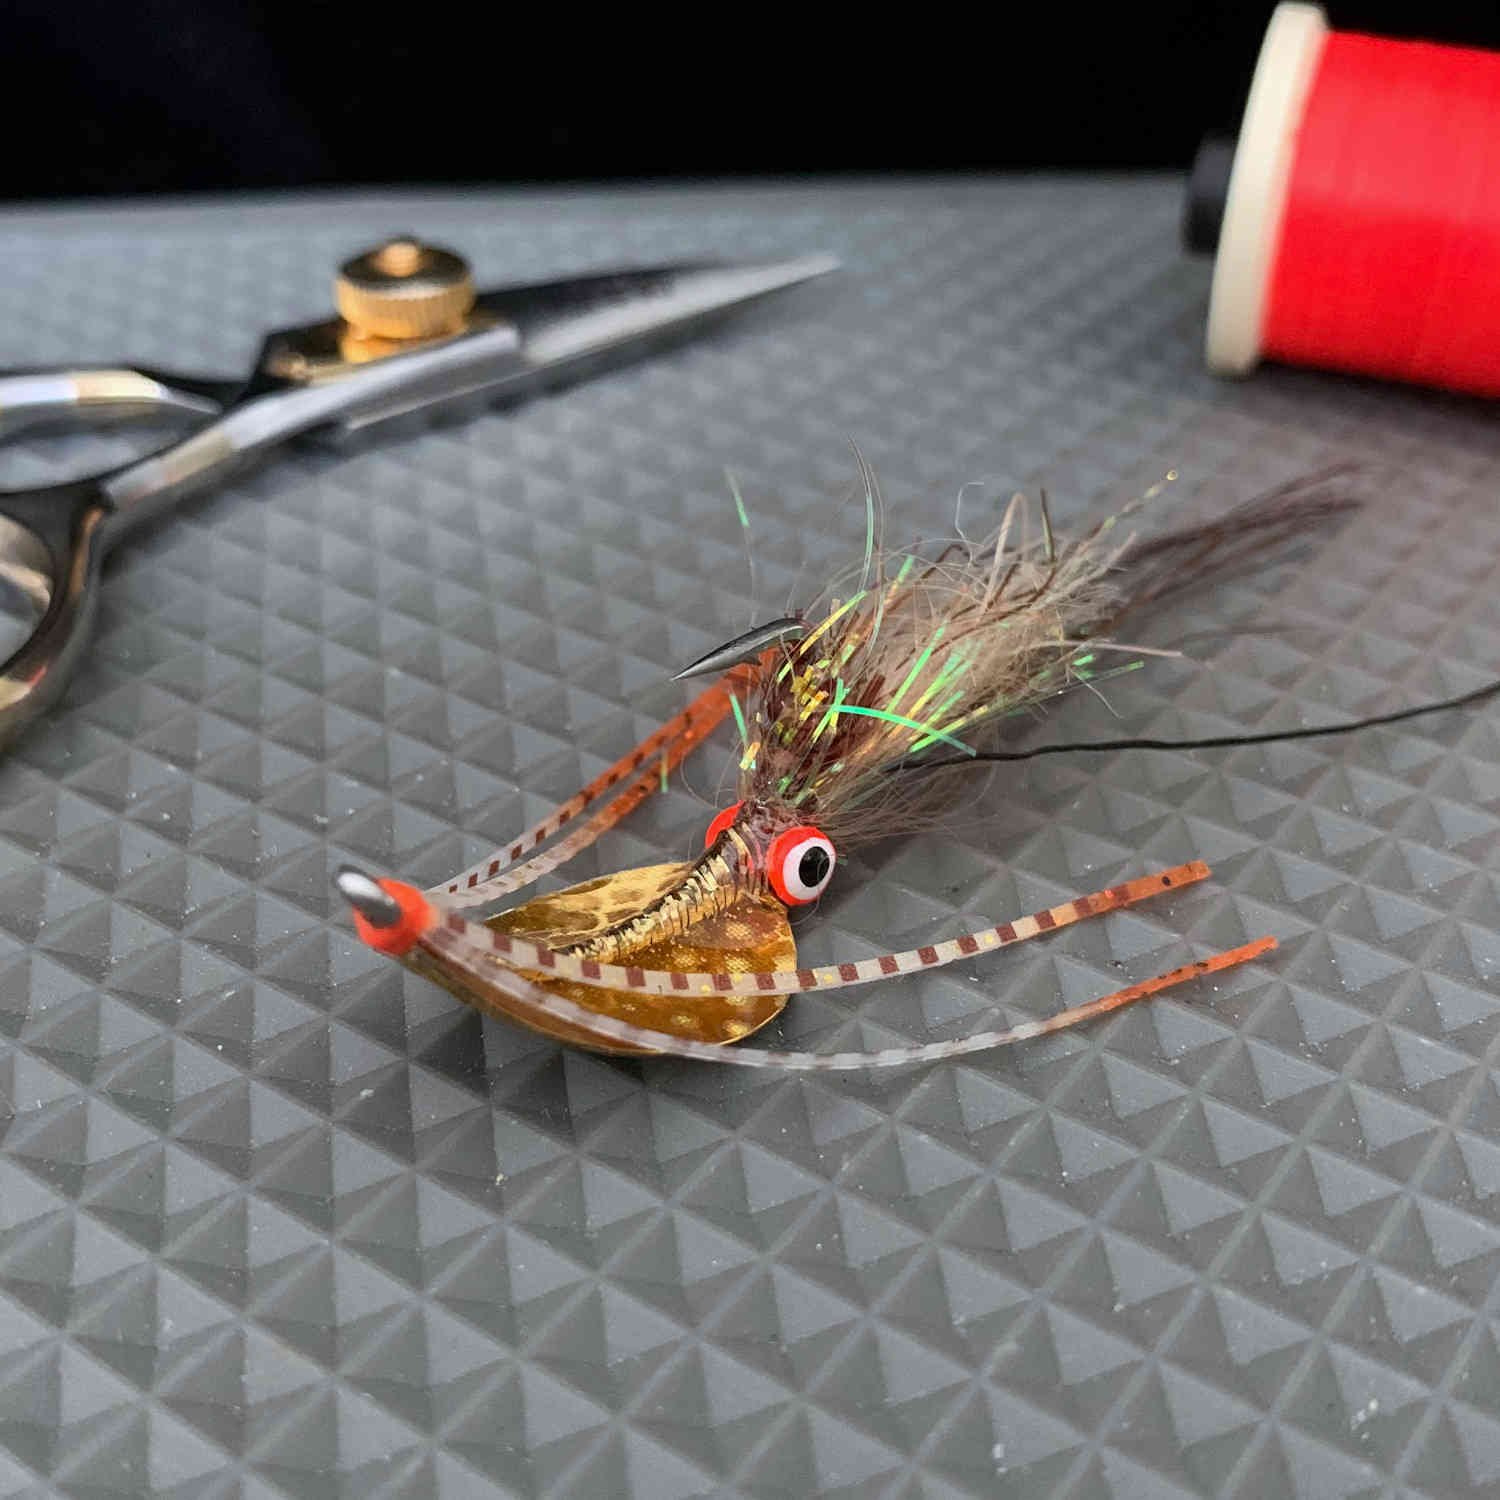
How To: Tying the Shrimpadillo
The Shrimpadillo Fly
Take a look at our most requested fly tying tutorial: How to tie the Shrimpadillo fly. This popular spoon fly variation has earned its place in the fly boxes of saltwater anglers for its high durability and its ability to consistently draw consistent strikes from Redfish and other game fish. With its unique blend of a shrimp-like profile and the wobbling action of a spoon, the Shrimpadillo perfectly imitates the movements of a distressed crustacean, making it irresistible to predatory fish.
The key to fishing this fly is to get it out in front of a fish and then pause the retrieve, allowing the fly to flutter down. The flicker and wobble while the fly falls imitates a wounded or fleeing prey, which can trigger a predatory strike.
In this step-by-step tutorial, we’ll guide you through the process of tying the Shrimpadillo, ensuring you capture all the details that make this fly so effective. Whether you're an experienced tyer looking to refine your skills or a newcomer eager to add a proven pattern to your collection, this tutorial will help you create a fly that’s sure to bring you success on the water. Let’s get started!
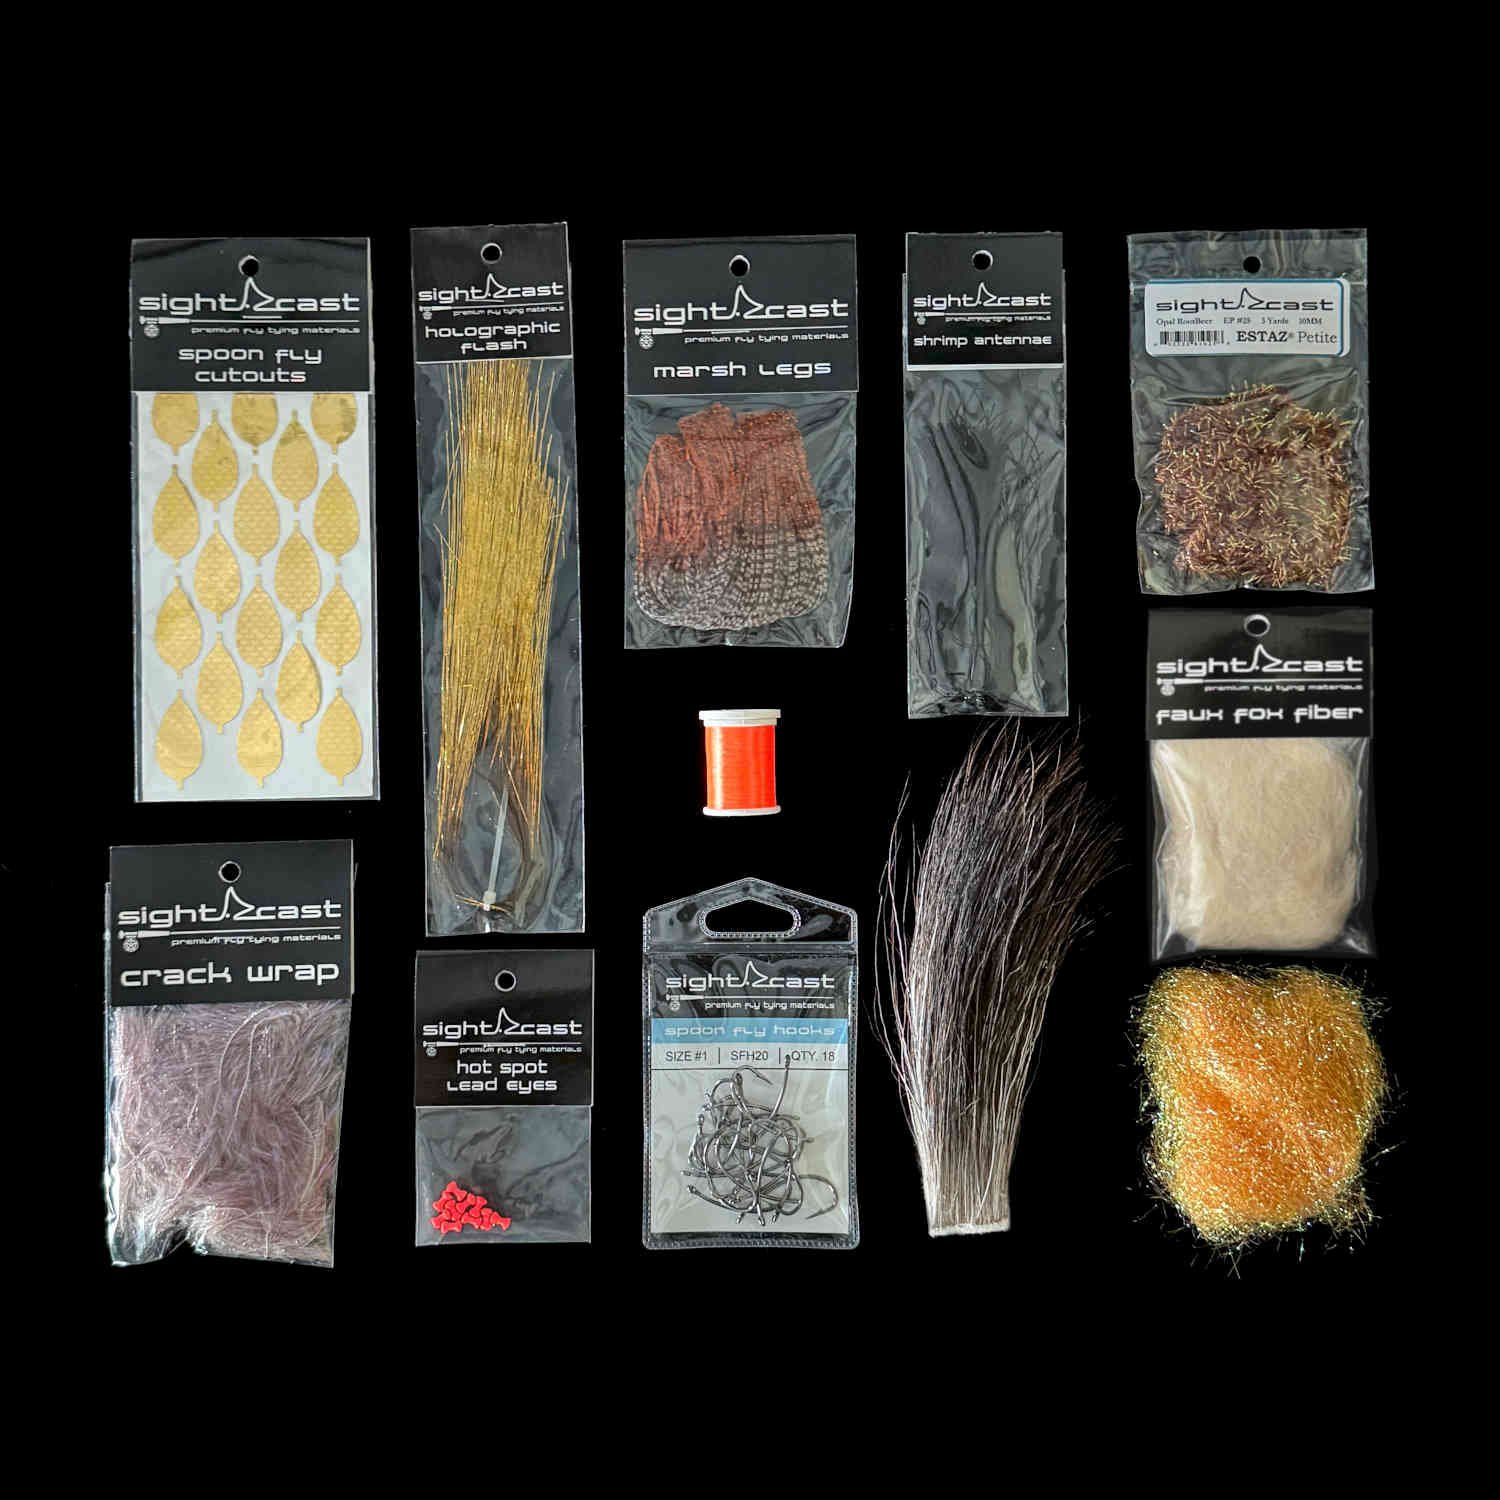
FLY TYING MATERIALS
(scroll down to the bottom to see the recipes for six effective color combinations)
Hot Spot: Estaz Petite
Tail: Faux Fox Fiber
Tail Flash: Ice Dub
Antennae: Shrimp Antennae
Head: Moose Mane
Eyes: Hot Spot Lead Eyes
Collar: Crack Wrap
Spoon Body: Spoon Fly Cutouts
Body Flash: Holographic Flash
Legs: Marsh Legs
Thread: SCFC Flat Waxed Nylon
Hook: Size 1 - SFH20 Spoon Fly Hook
Epoxy: Flex Coat Lure Gel
HOW TO TIE A SHRIMPADILLO FLY
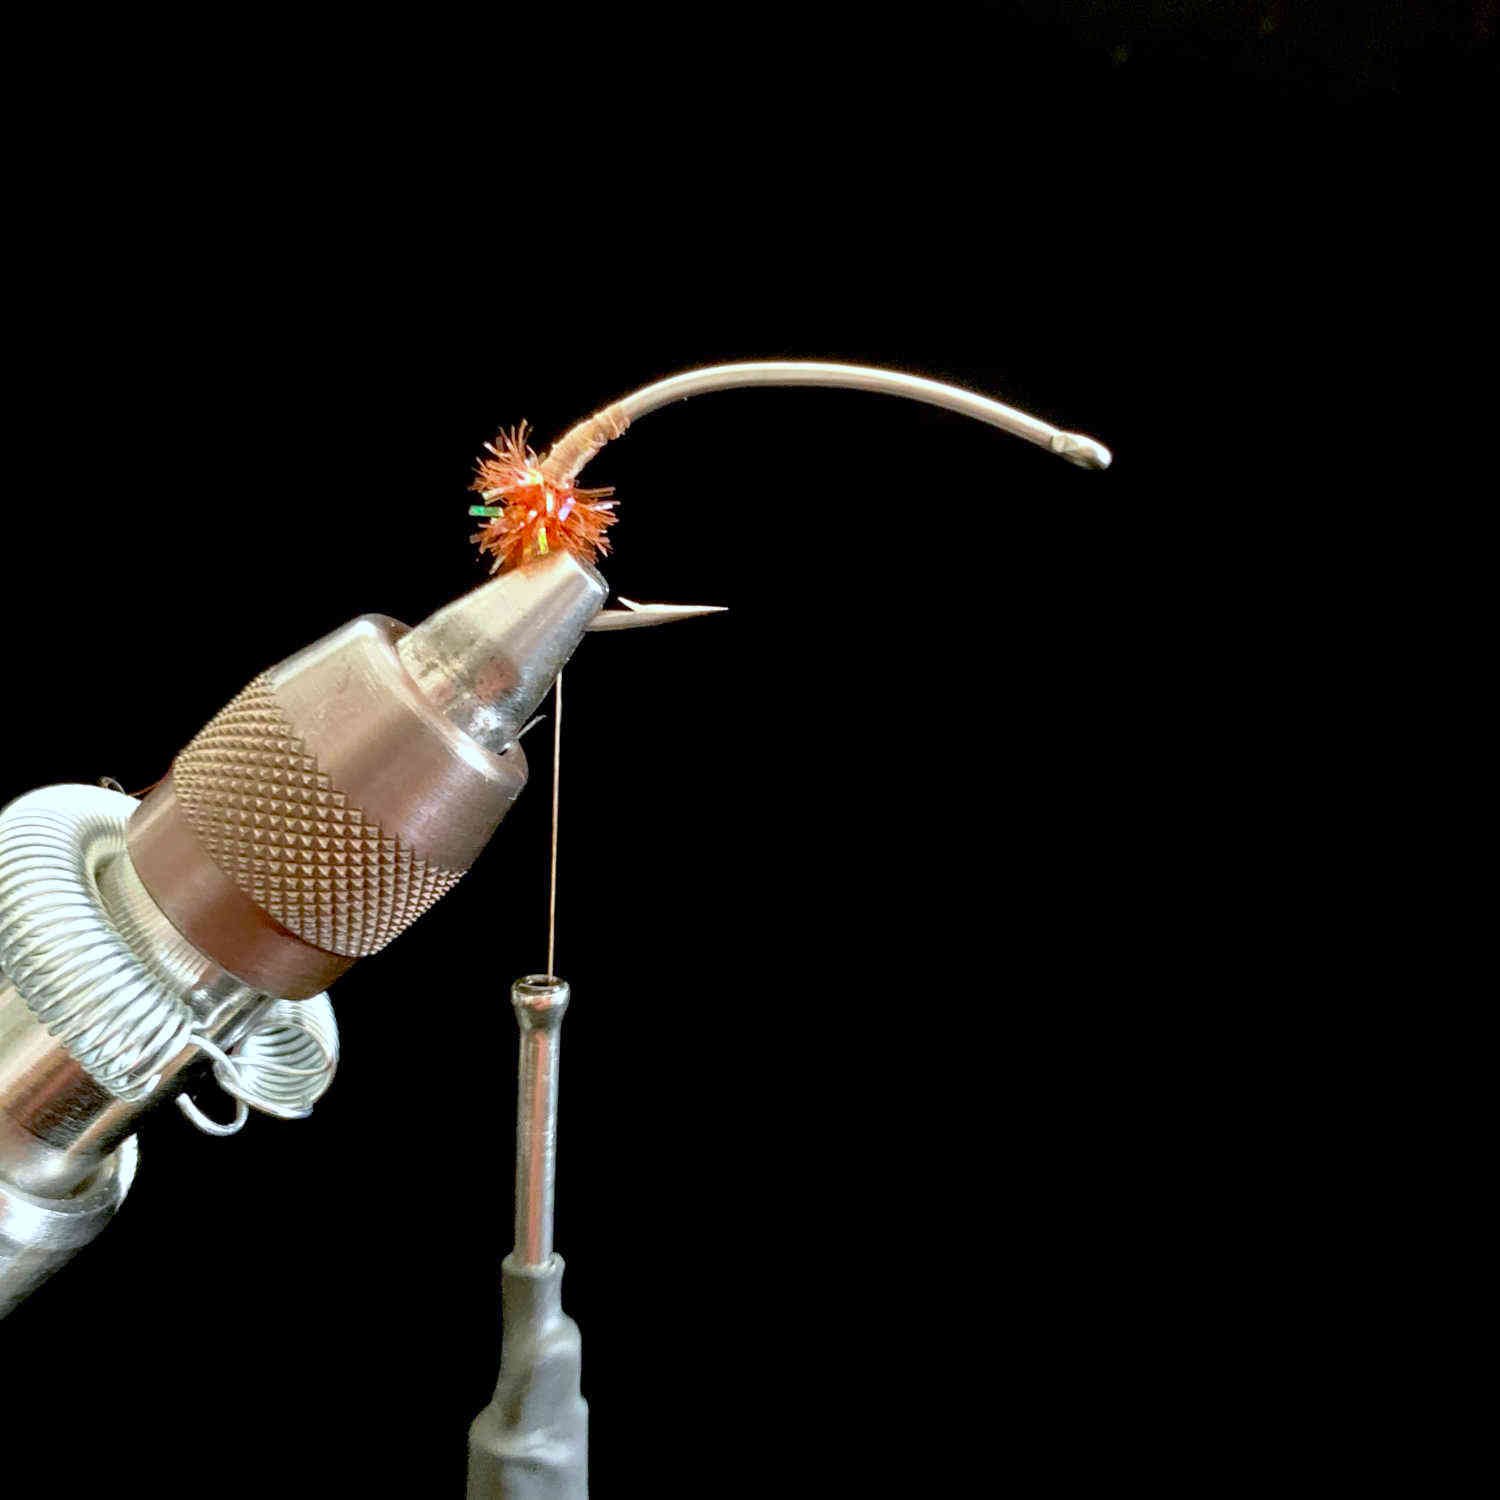
STEP 1:
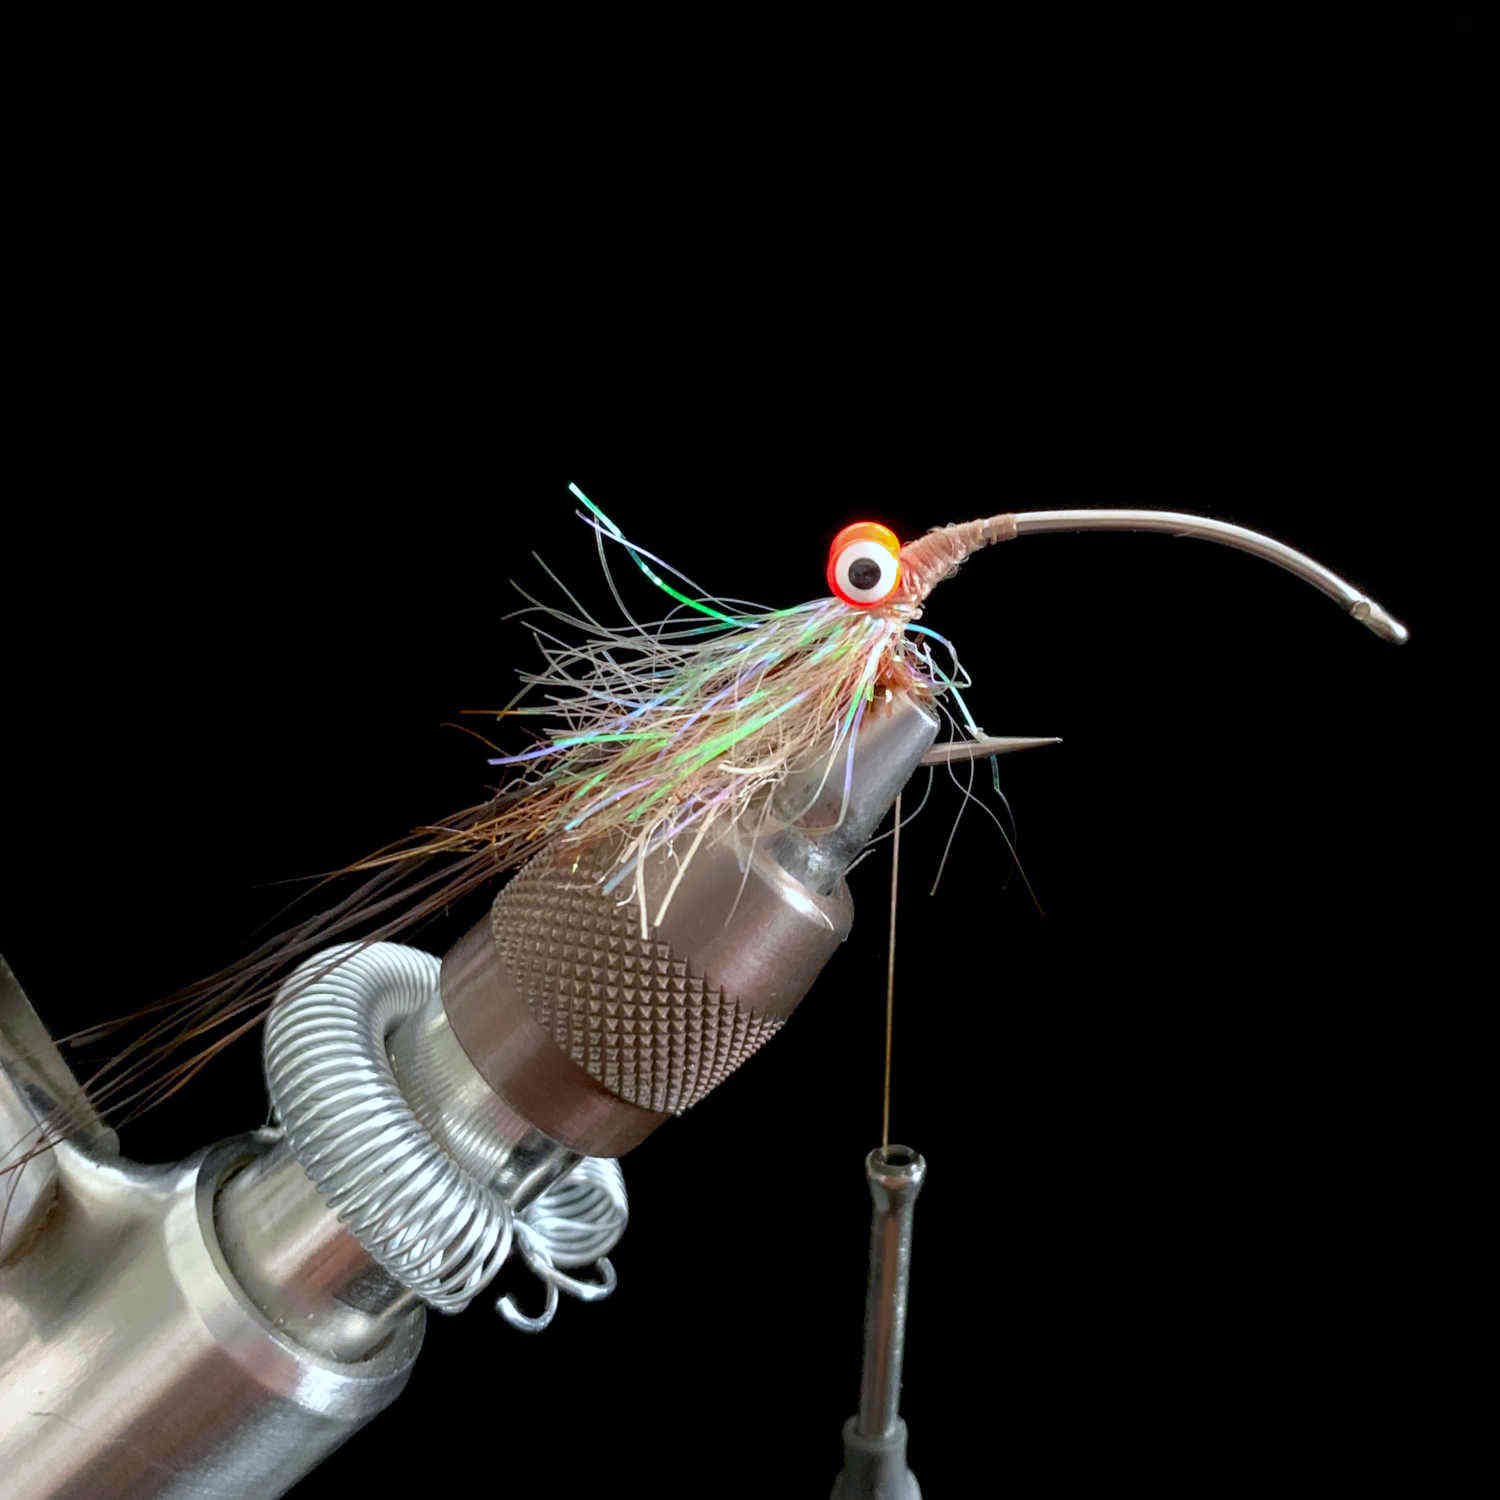
Start by adding a hot spot with a few wraps of Estaz Petite.
Note the position of the finished hot spot far down the bend of the hook.
Tip: Use a Spoon Cutout temporarily placed on top of the hook shank to help measure the hot spot’s location.
Step 2:
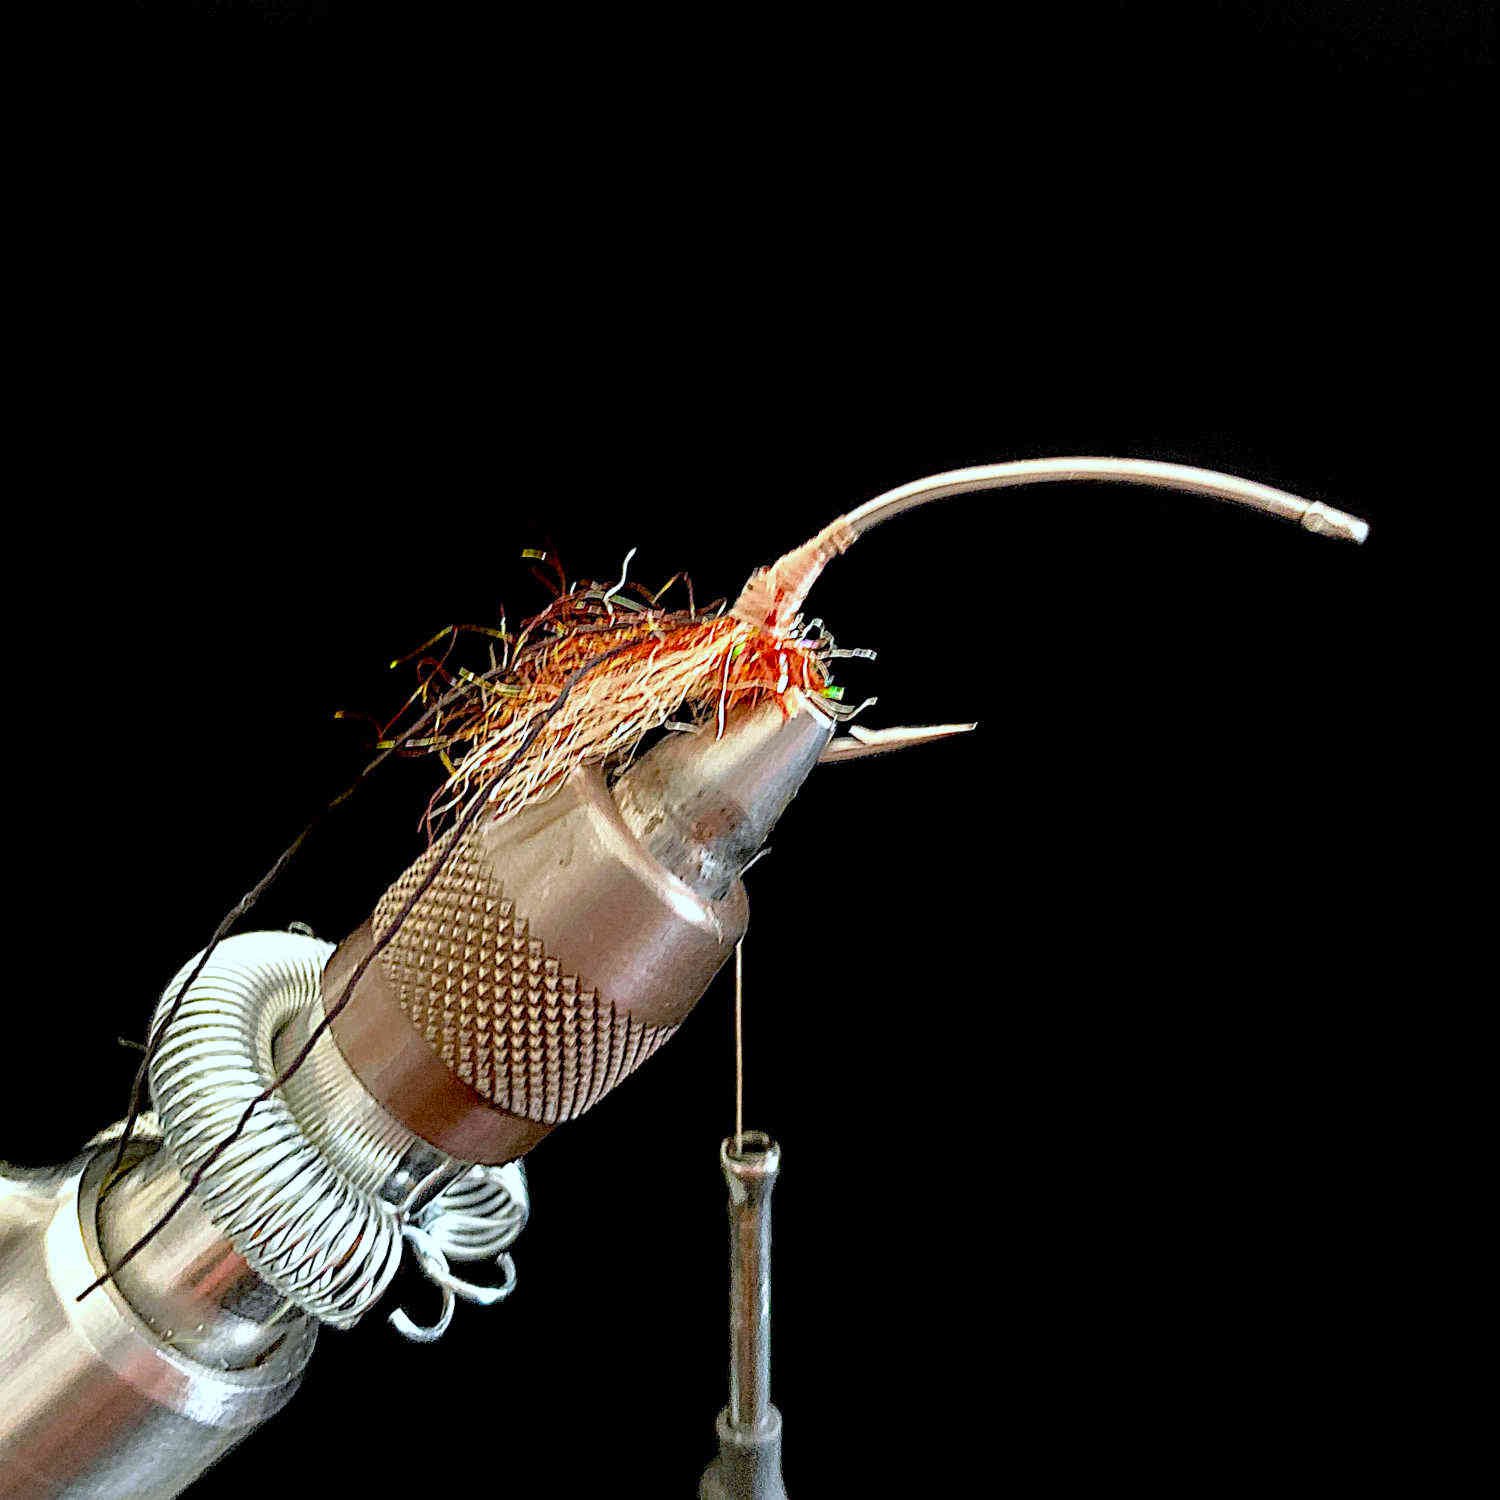
Add a small pinch of Faux Fox Fibers or your favorite dubbing to create a small tail.
In the example picture, a small pinch of Redfish Brush is used. Other materials like a small piece of rabbit zonker or Arctic Fox Tail are also great choices.
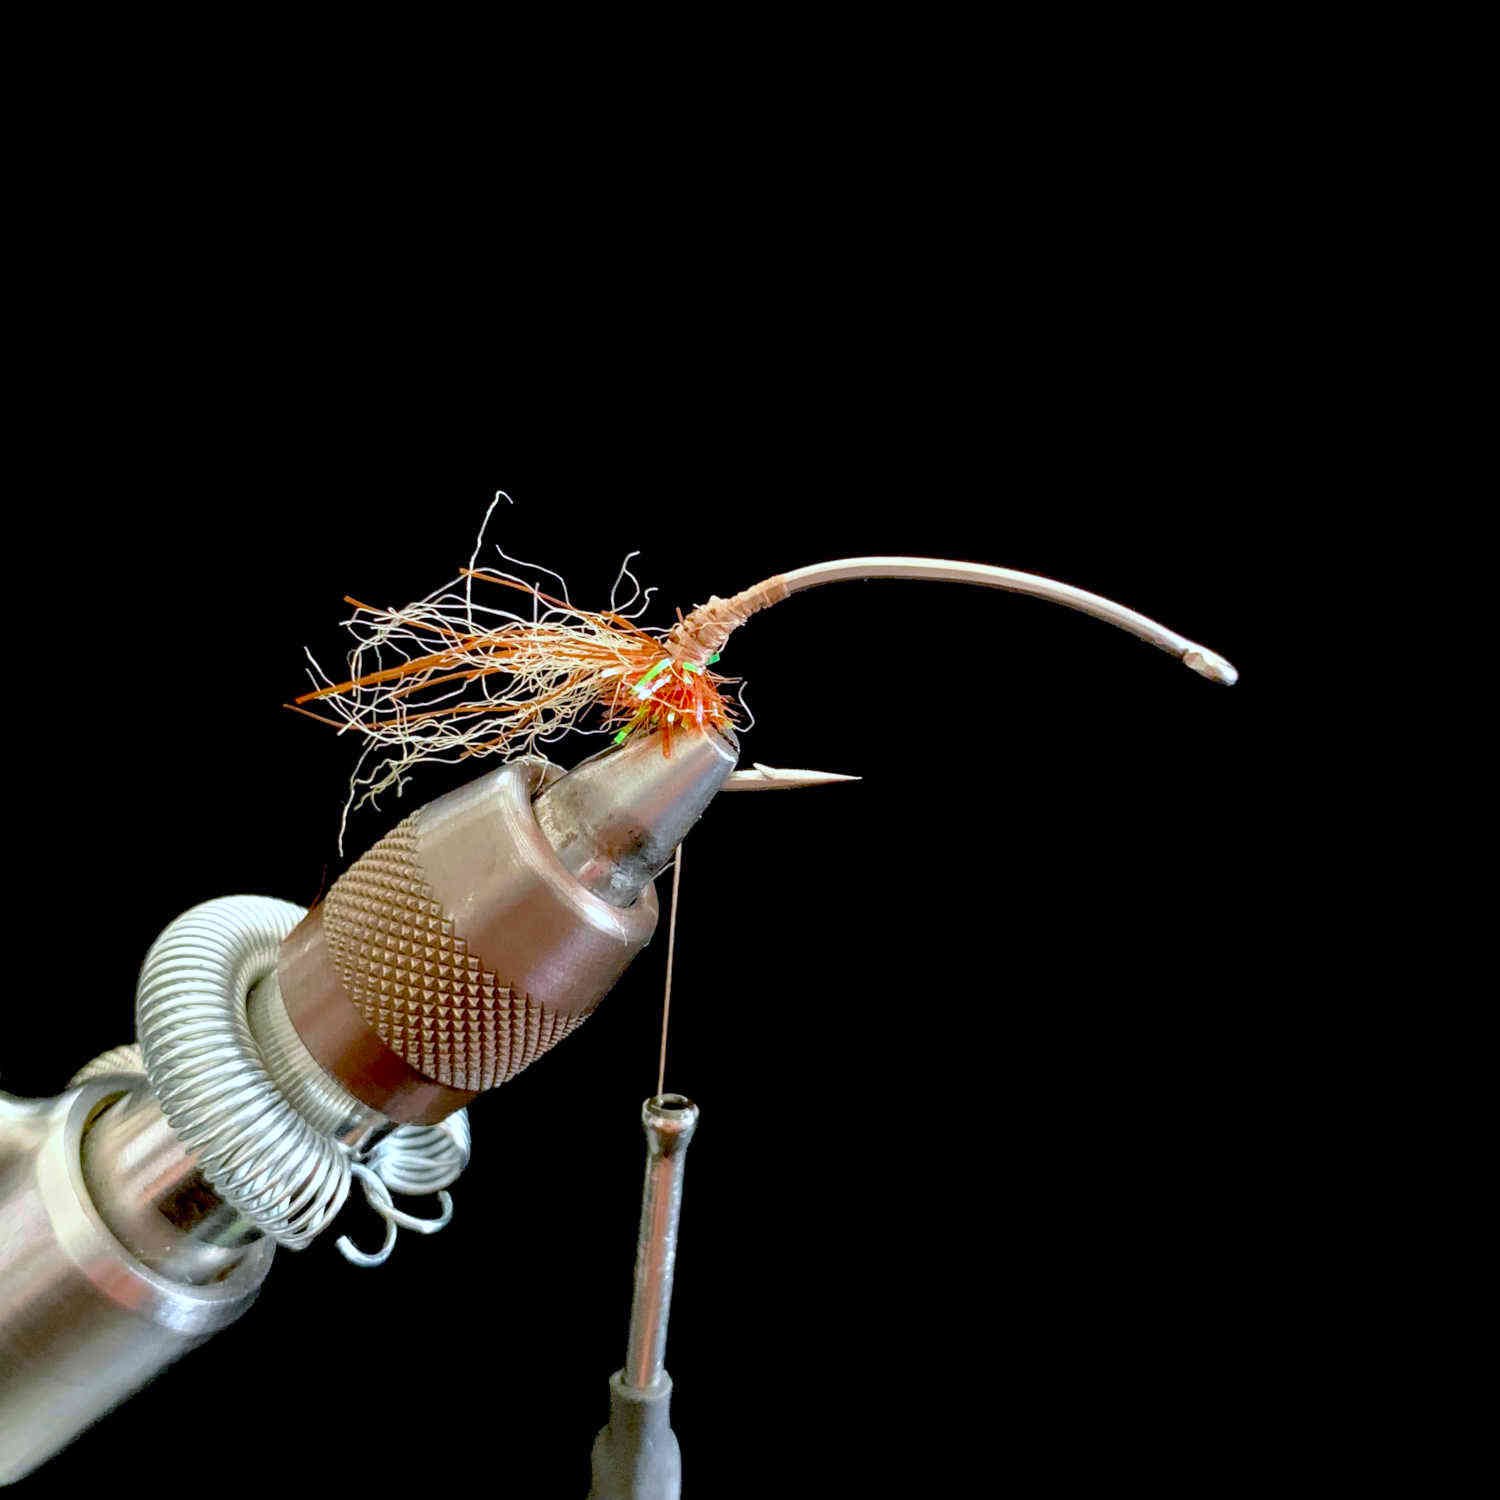
Step 3:
Tie in a small pinch of Ice Dub on top of the tail to provide a little flash.
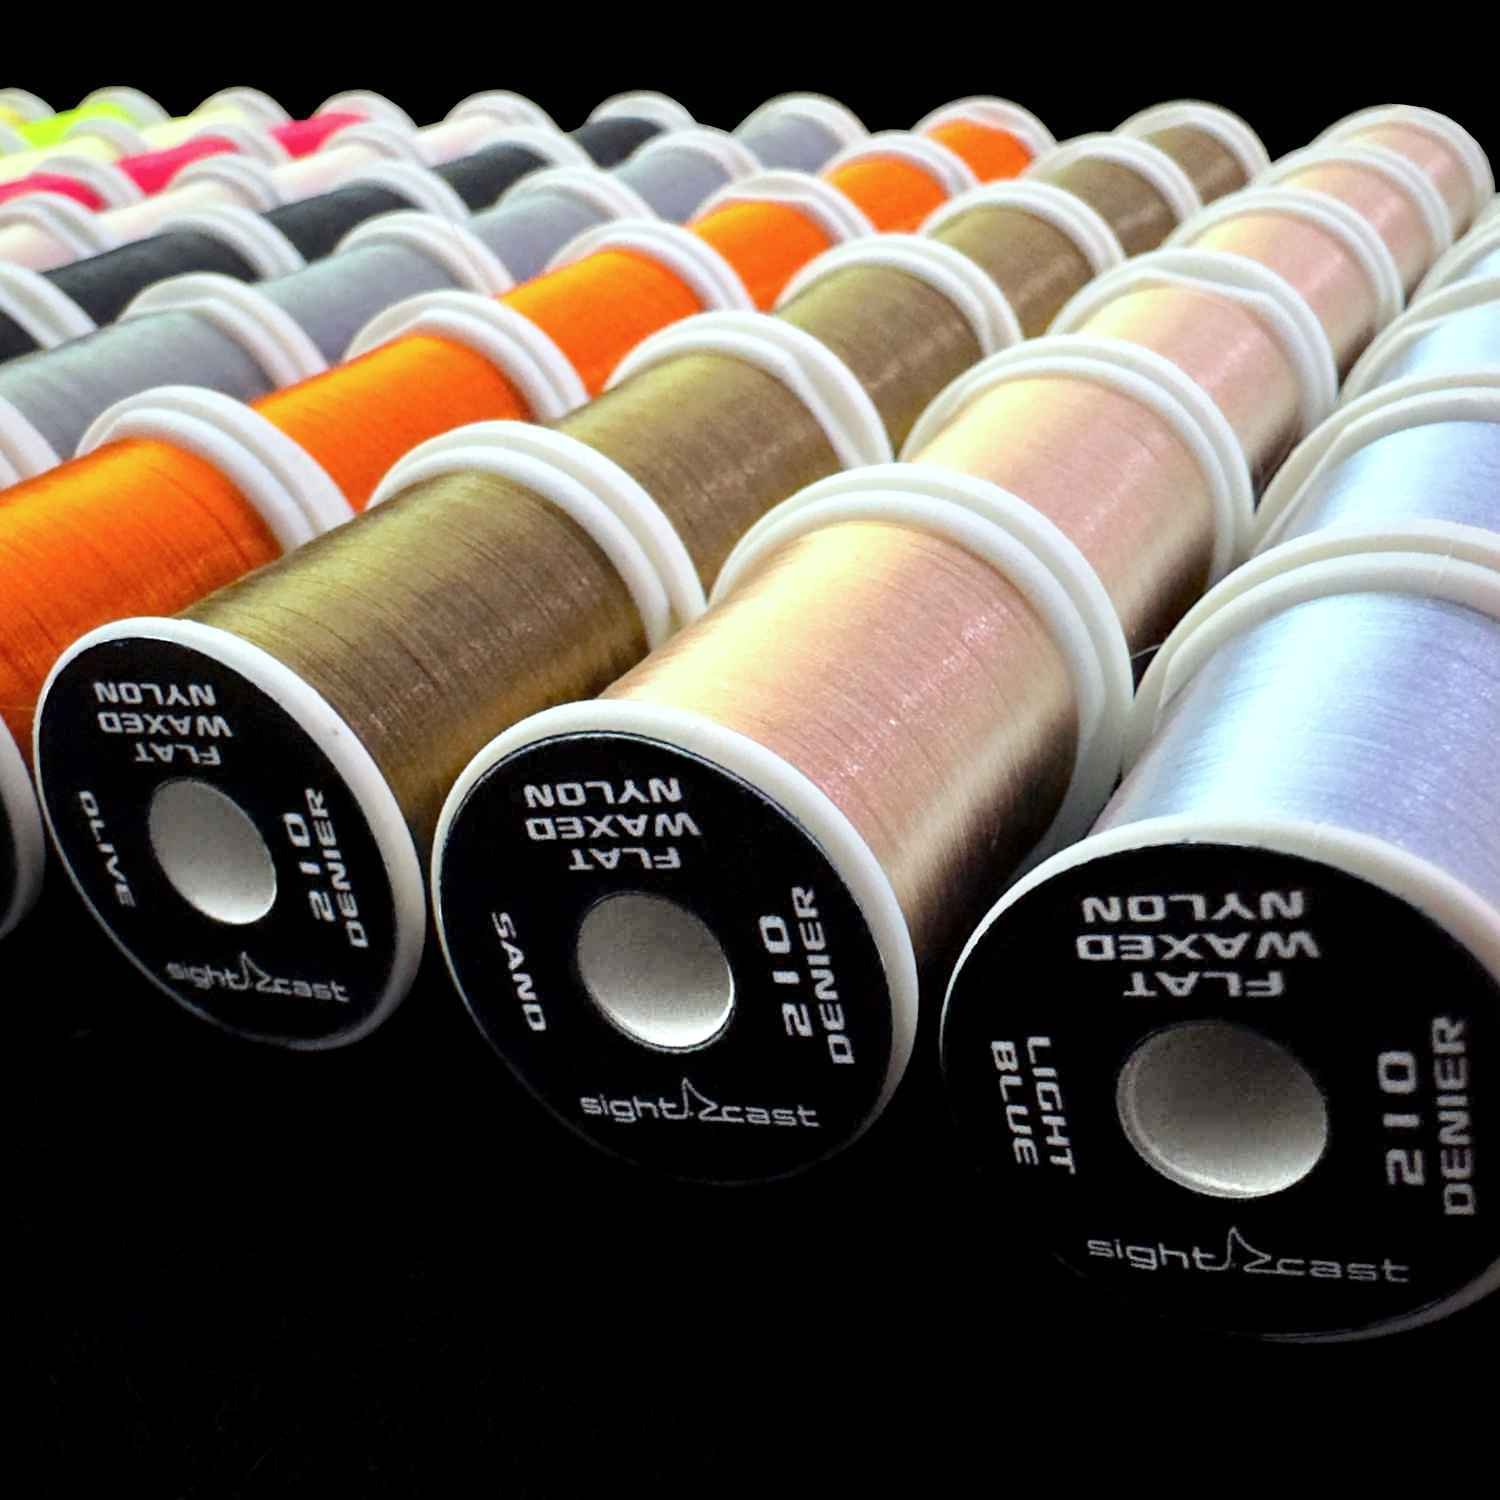
SCFC - Flat Waxed Nylon Thread
The #1 thread for tying saltwater flies. Over 20 unique colors to compliment a wide array of popular crab, baitfish, and shrimp fly patterns. A strong, pre-waxed thread that lays super flat and traps material very well. Measuring at 210 denier it is a great choice for all your large fly patterns, spinning deer hair, and more.
Step 4:
Tie in two strands of Shrimp Antennae on top of the tail.
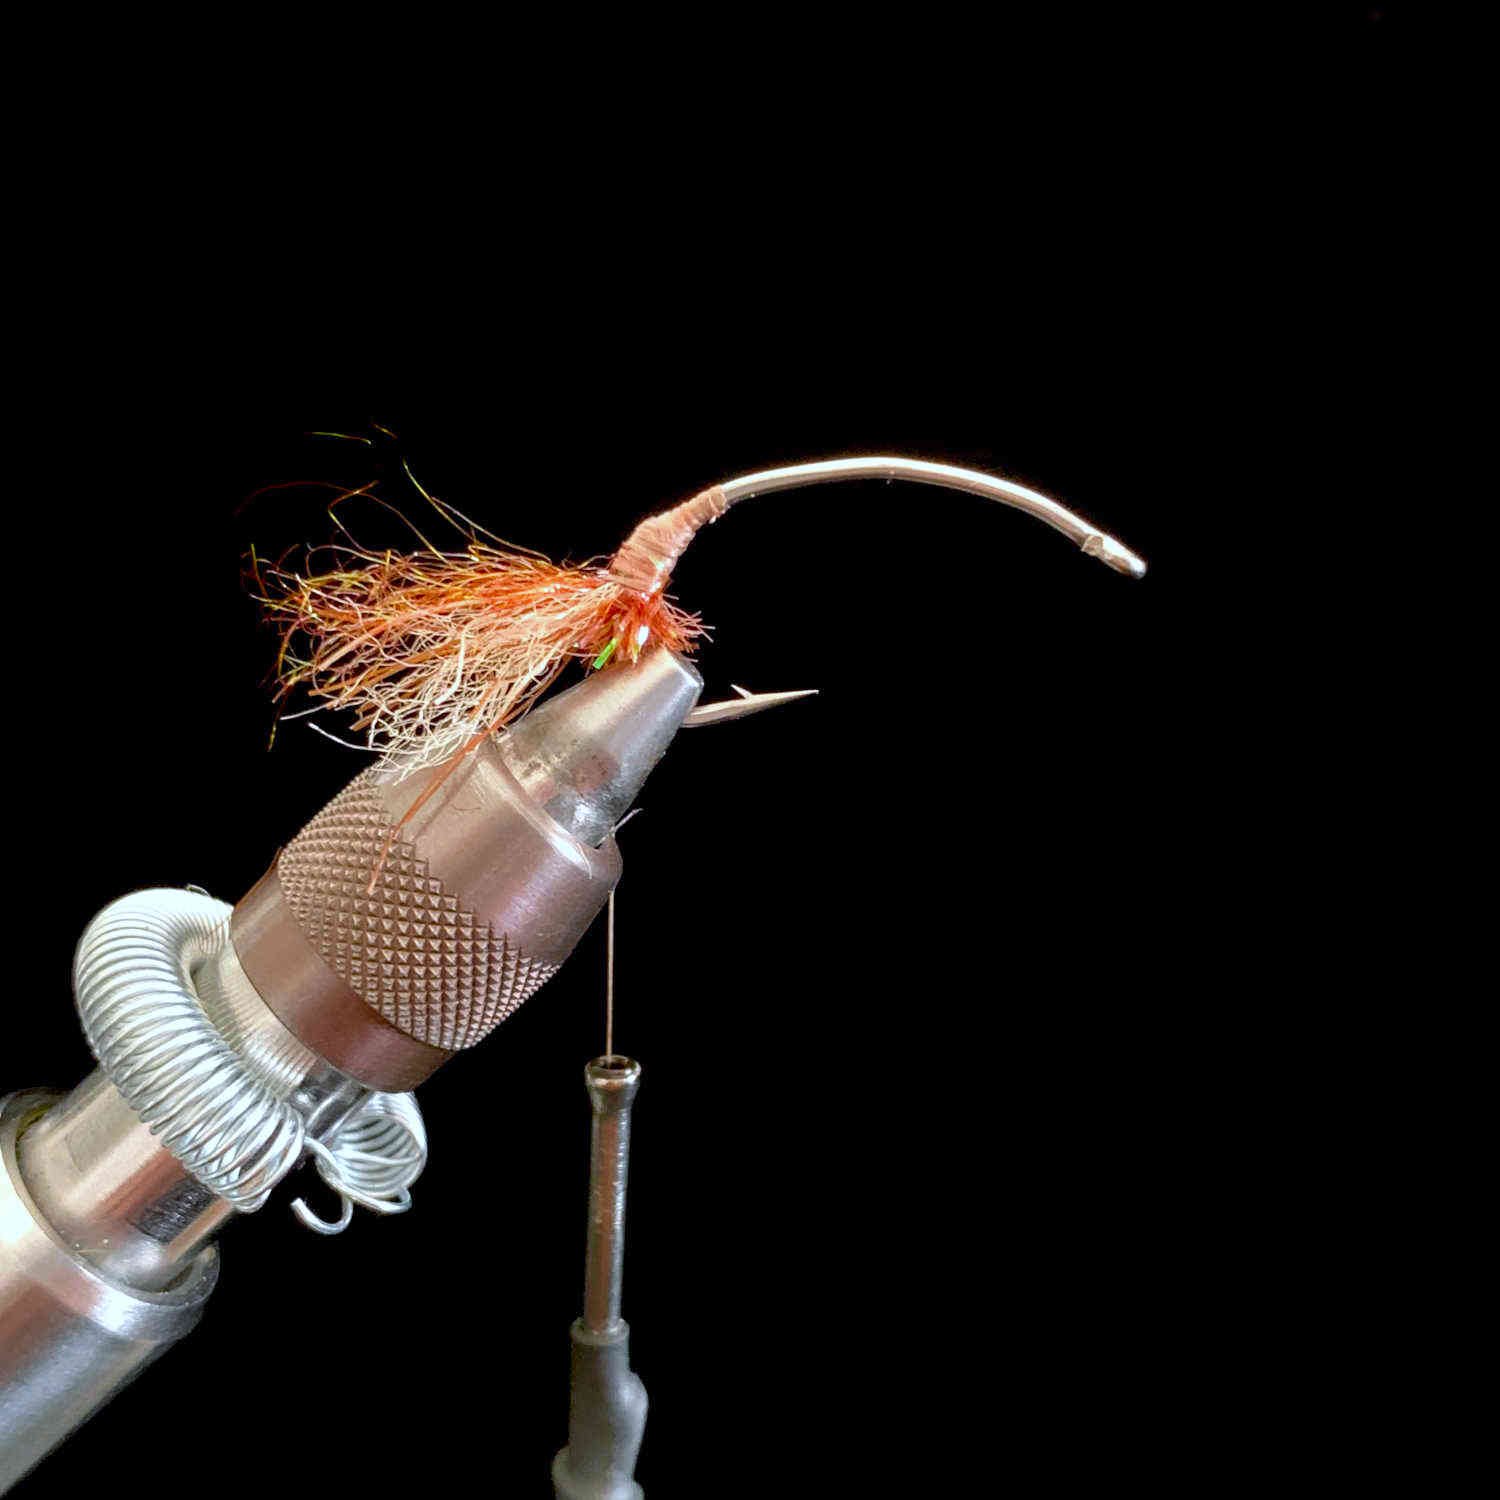
Step 5:
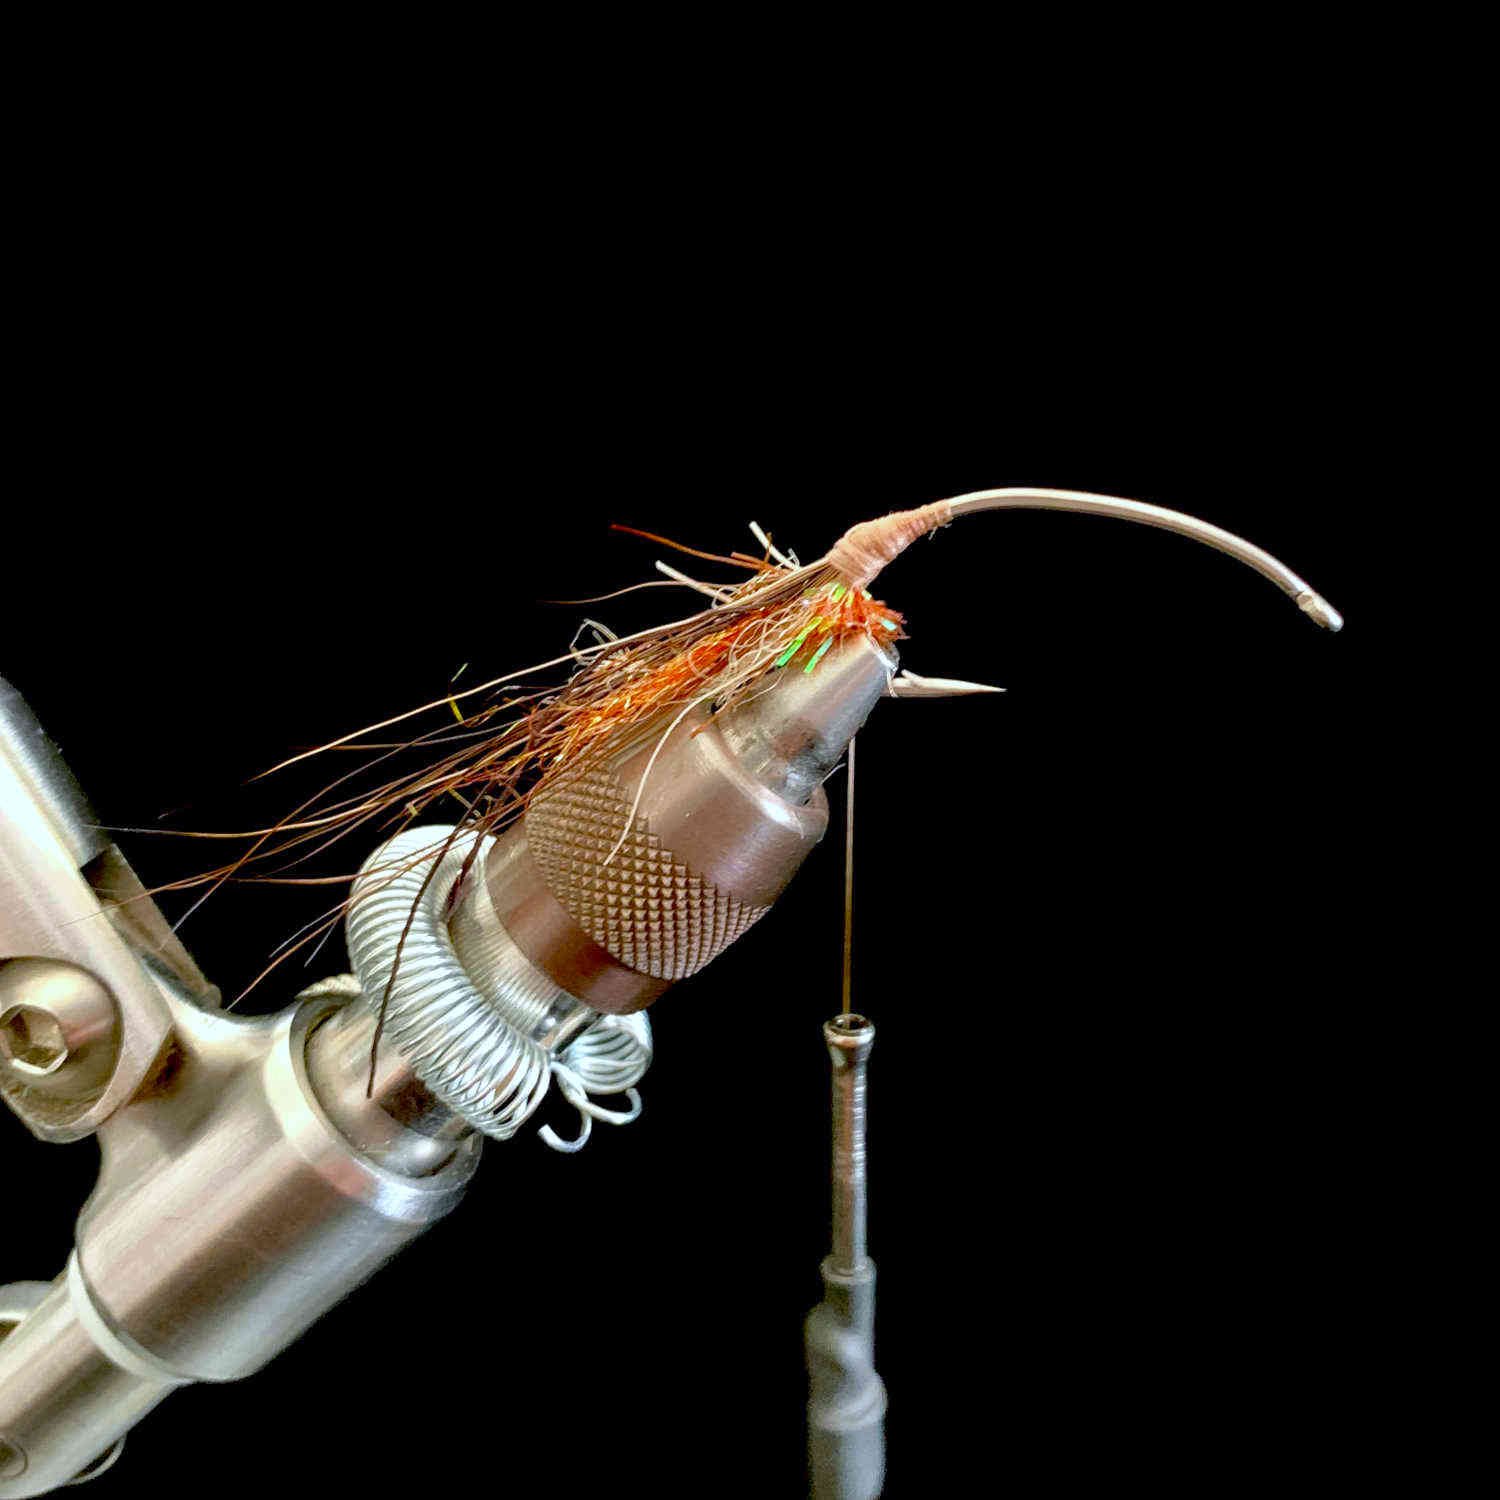
To complete the tail of the fly, take approximately 7-8 strands of Moose Mane and tie them in on top of the rest of the materials.
Note the “bump” in the thread body created by tying in all the tail materials. It’s beneficial to keep this “bump” as small and tapered as possible to aid in tying the remaining steps of the fly.
Step 6:
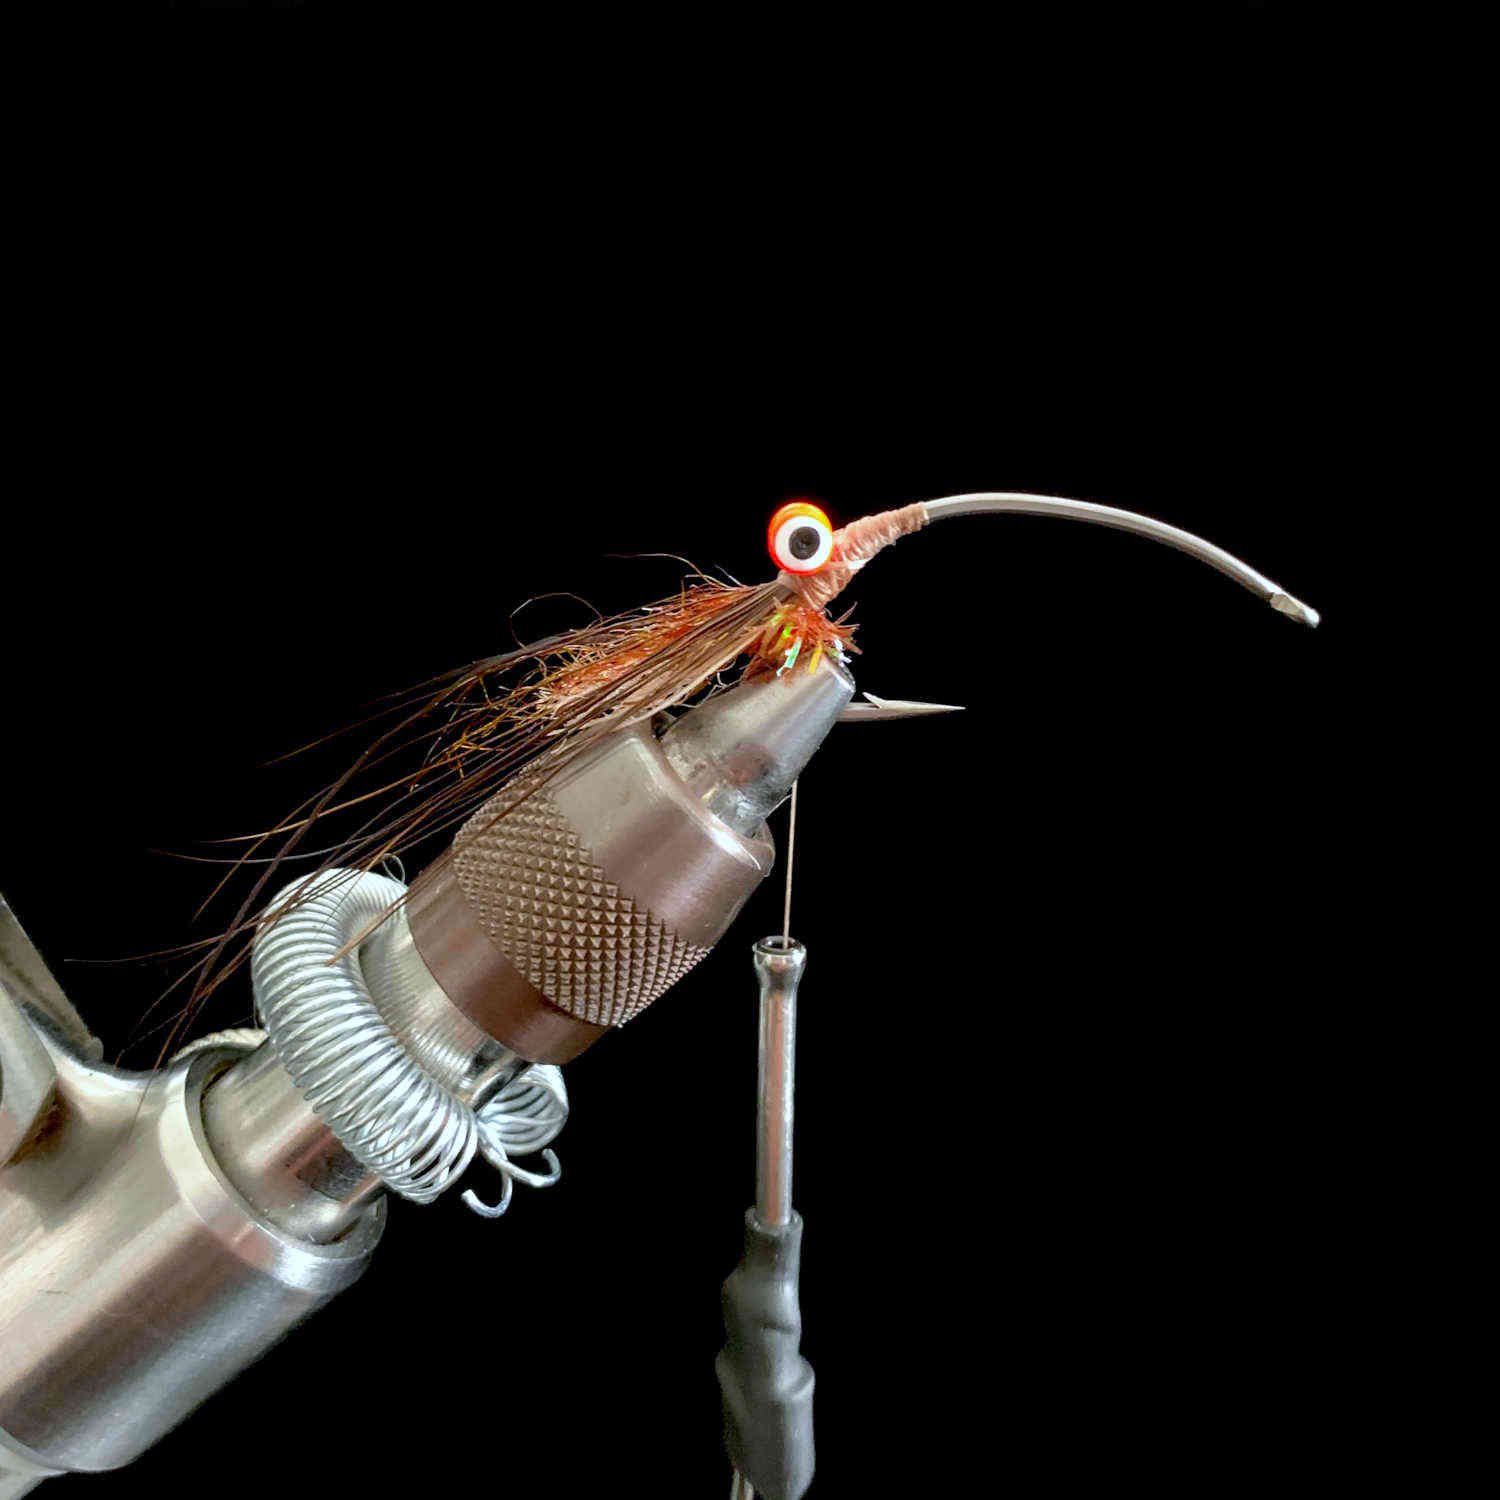
Tie in a pair of lead eyes at the base of the tail.
Tip: Use a Spoon Cutout temporarily placed on top of the hook shank to help measure the eye placement location.
The classic lead dumbbell eyes you know and love are now available in 16 fishy colors that are sure to compliment any color fly you’re tying up.
Step 7:
Next, tie in some Crack Wrap to form a collar behind the lead eyes. Use approximately 2-3 wraps.
Be sure to pull the fibers rearward after each wrap to avoid any trapped fibers and to ensure they are facing the direction of the tail.
The exposed thread behind the eyes should be completely covered up after this step.
Shaggy Wrap is also a great choice of material to use for the collar if less flash is desired.
Step 8:
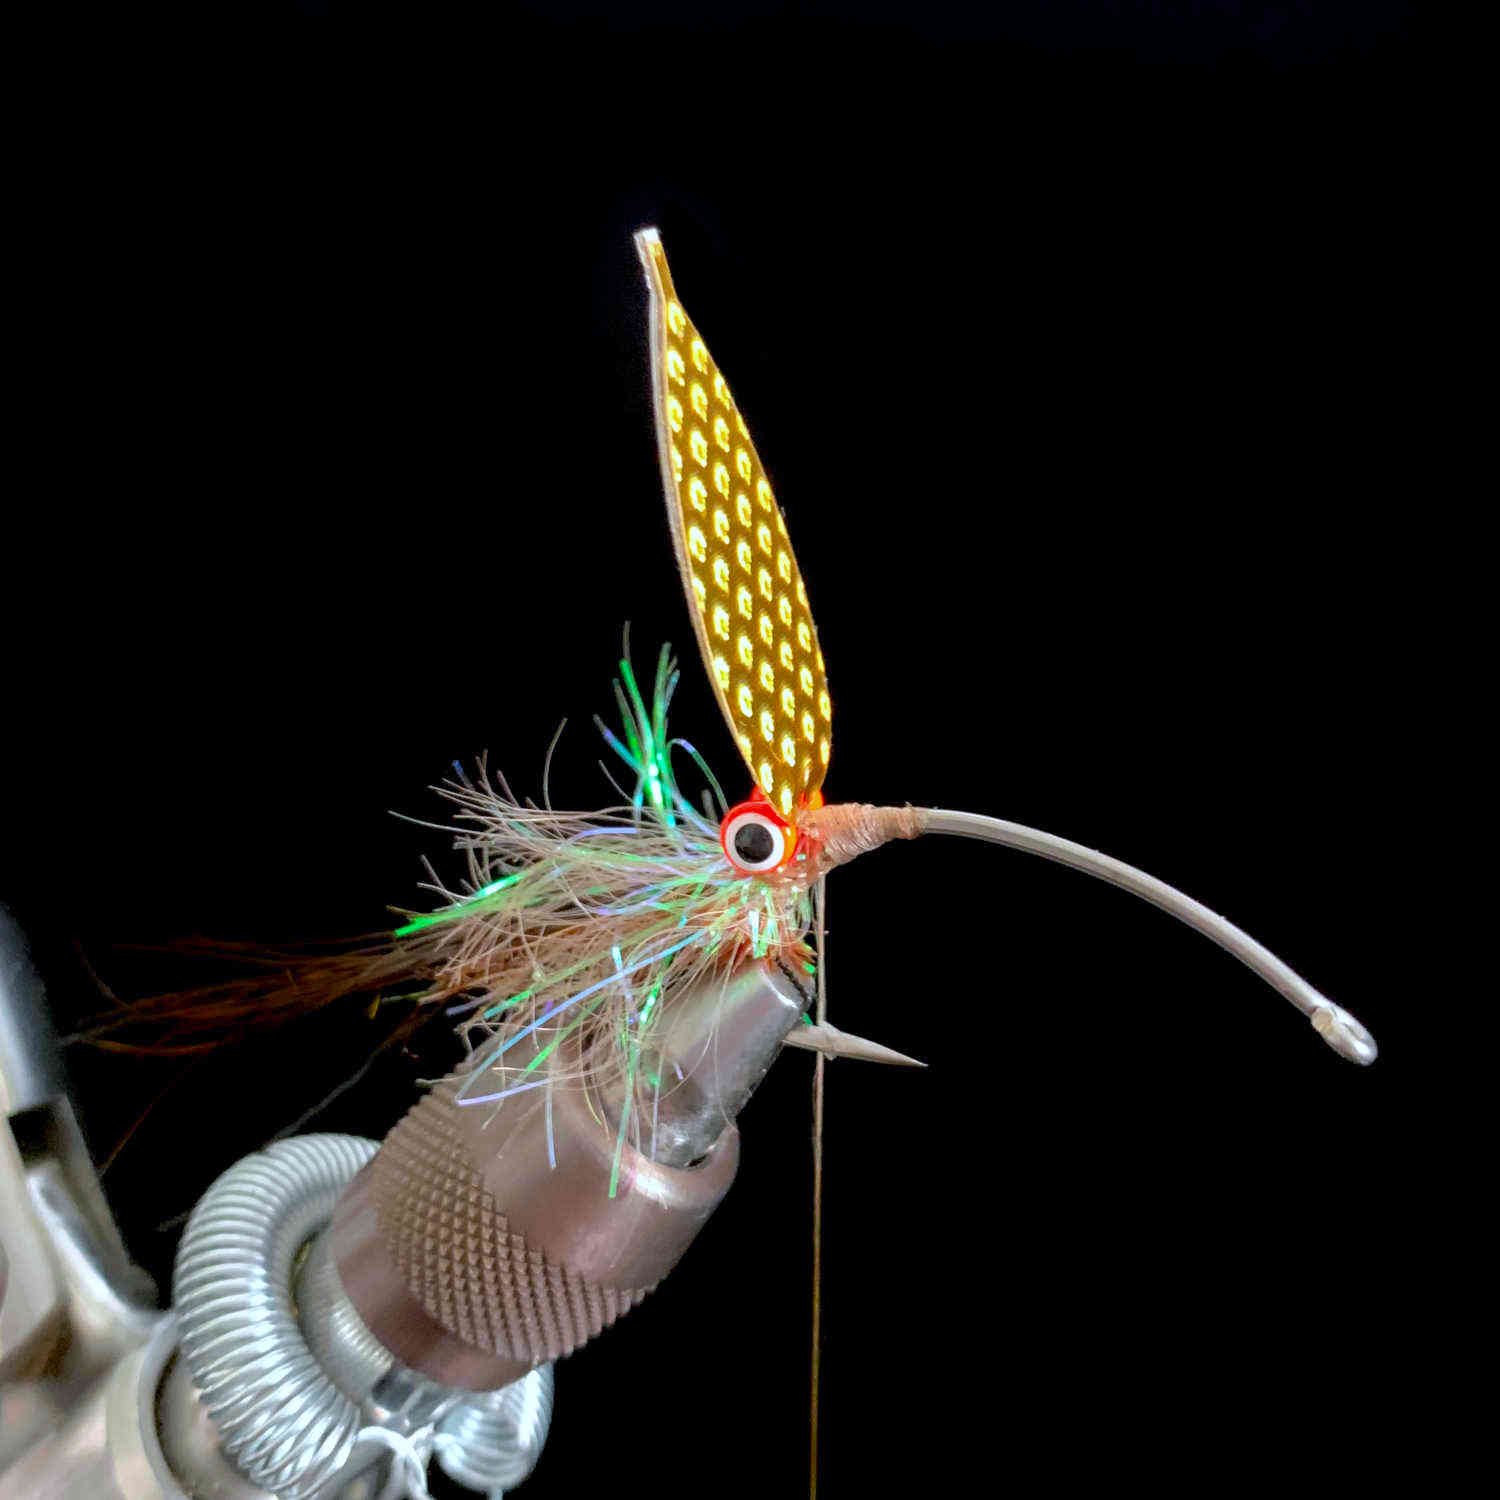
Now it’s time to tie in the Spoon Fly Cutout. If you’ve been temporarily placing the Spoon Cutout on top of the hook shank in the previous steps to double-check the placement, then you should be good to go!
The wide end of the Spoon Cutout should be next to the lead eyes and the “tie-in tab” should point towards the front of the hook.
Step 10:
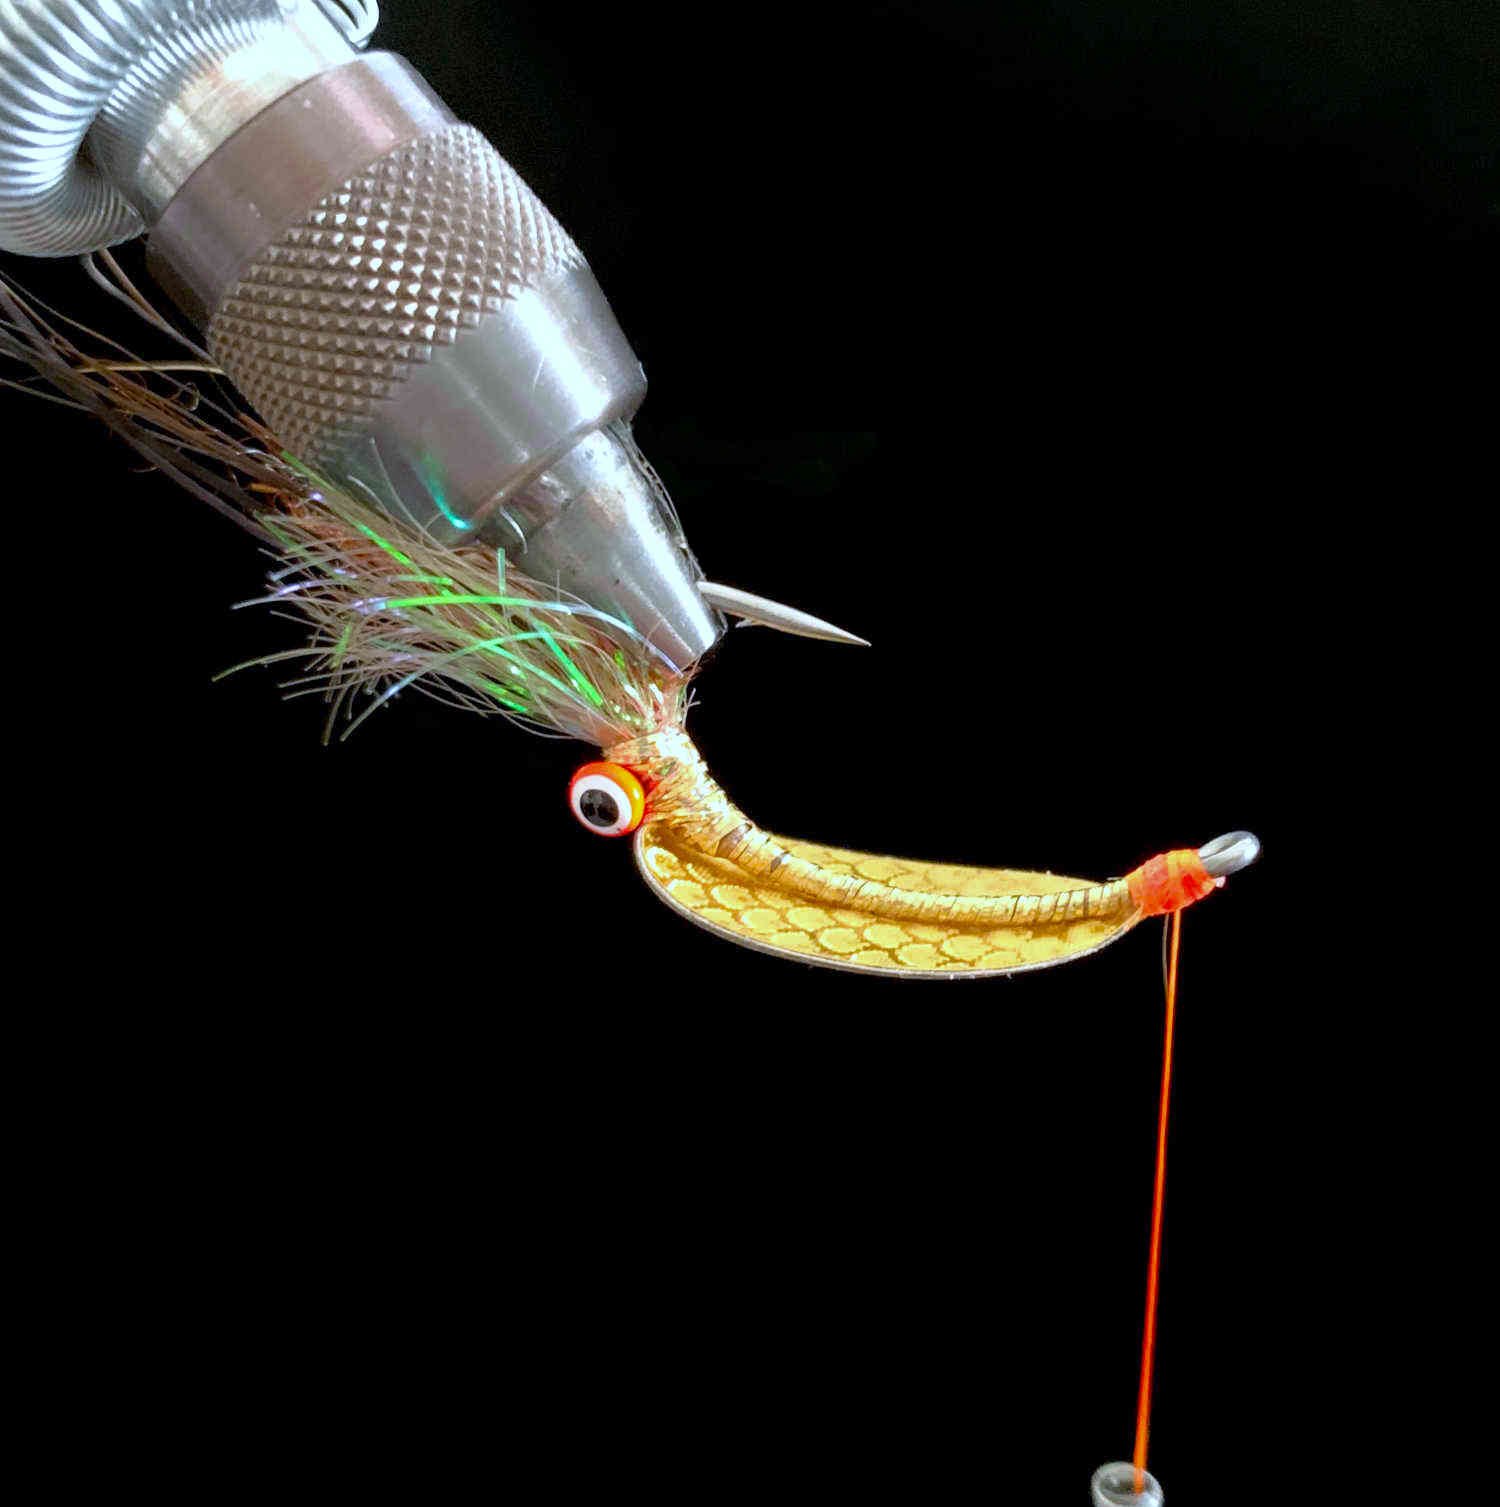
Next tie in approximately 4-5 strands of Holographic Flash.
First use the flash to do some “X-wraps” around the leads eyes to cover the exposed thread.
Then use the remaining flash to palmer around the hook shank all the way to the eye of the hook.
Streamline your spoon fly tying. The sizes of the SFH20 Spoon Fly Hooks were developed to perfectly fit the Spoon Fly Cutouts to give your spoon fly maximum movement and an increased wobble effect. We took out all the hard work and made it easy to whip some up before your next trip.
Step 10:
After wrapping the flash all the way to the eye of the hook, there should be no exposed thread or bare hook shank exposed.
Step 12:
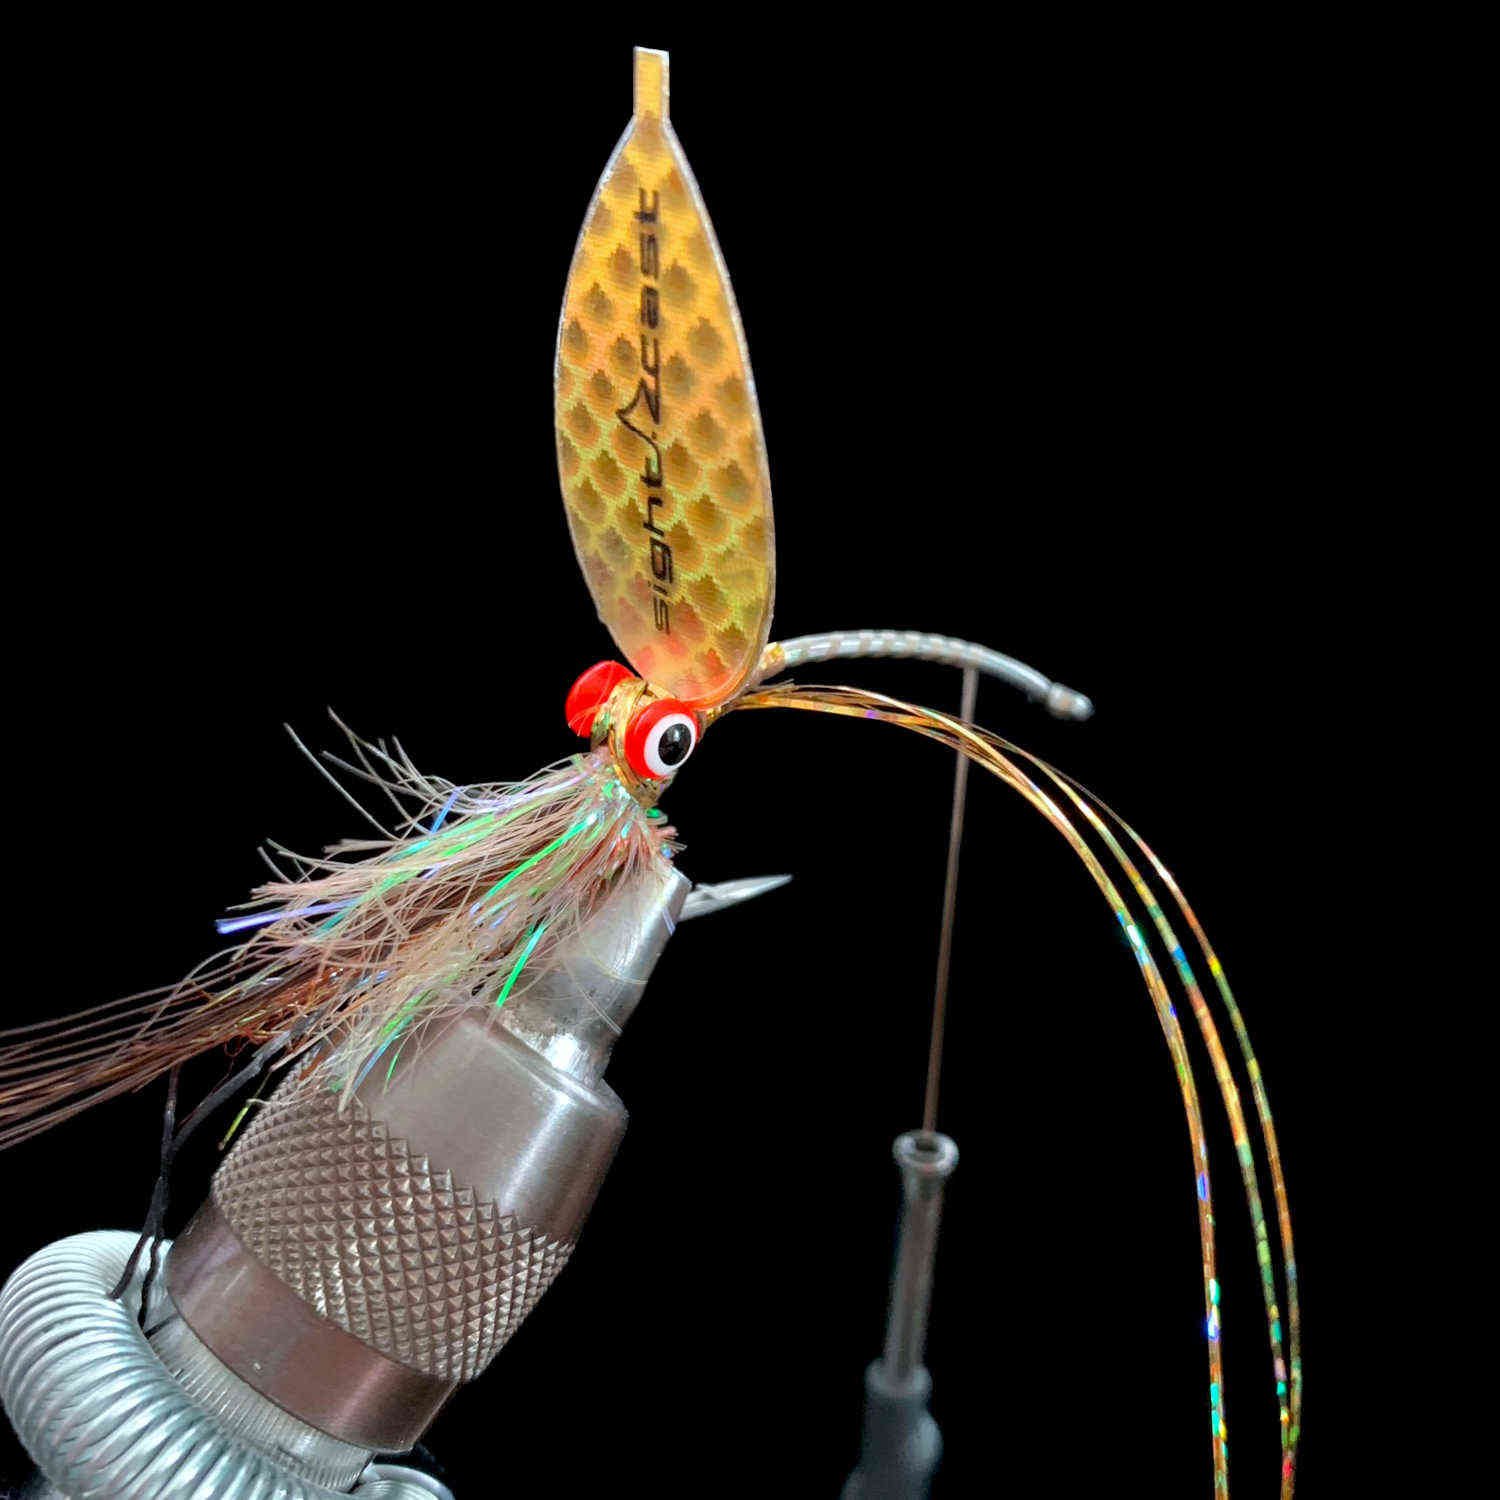
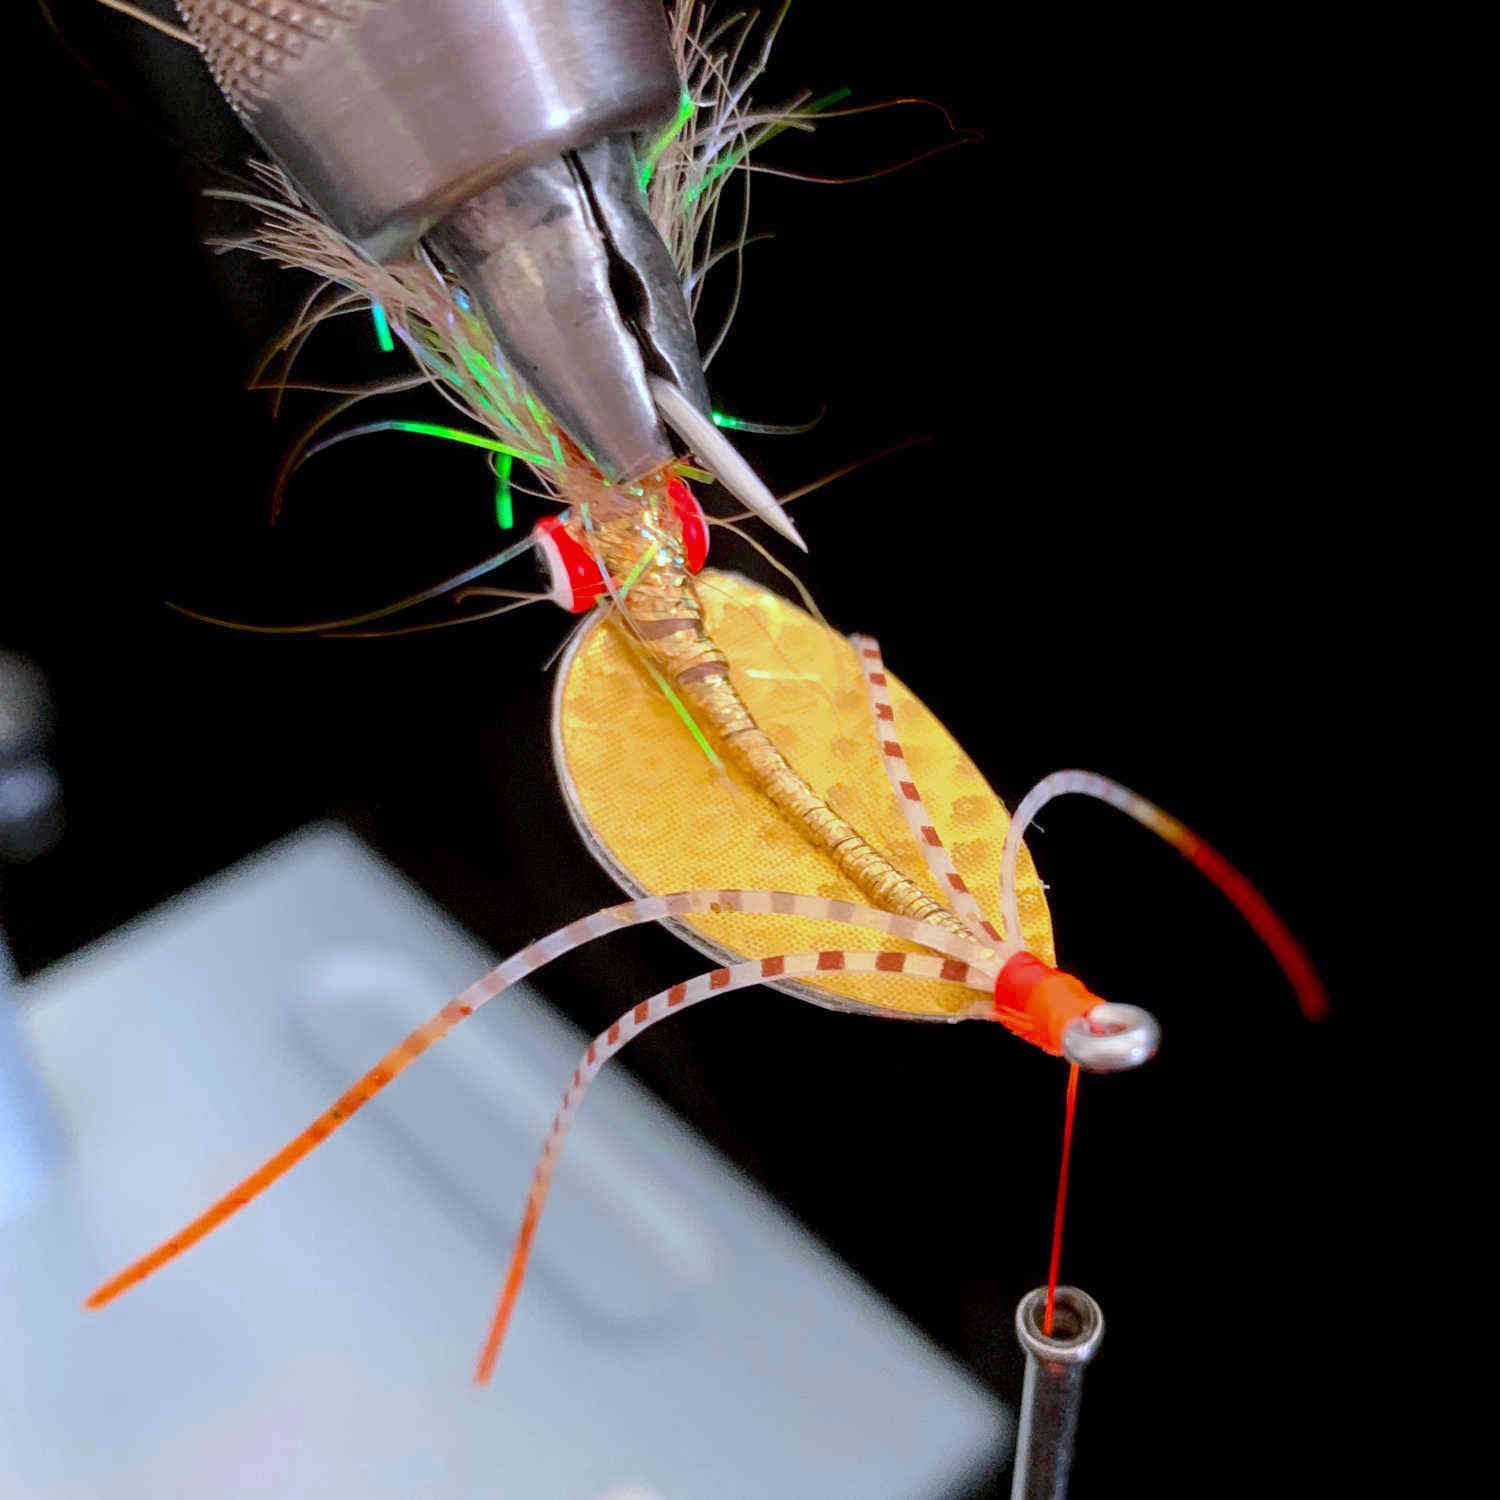
Tie in two Marsh Legs. Spread the legs evenly to both sides of the fly. Half on the left side, and half on the right side.
Step 13:
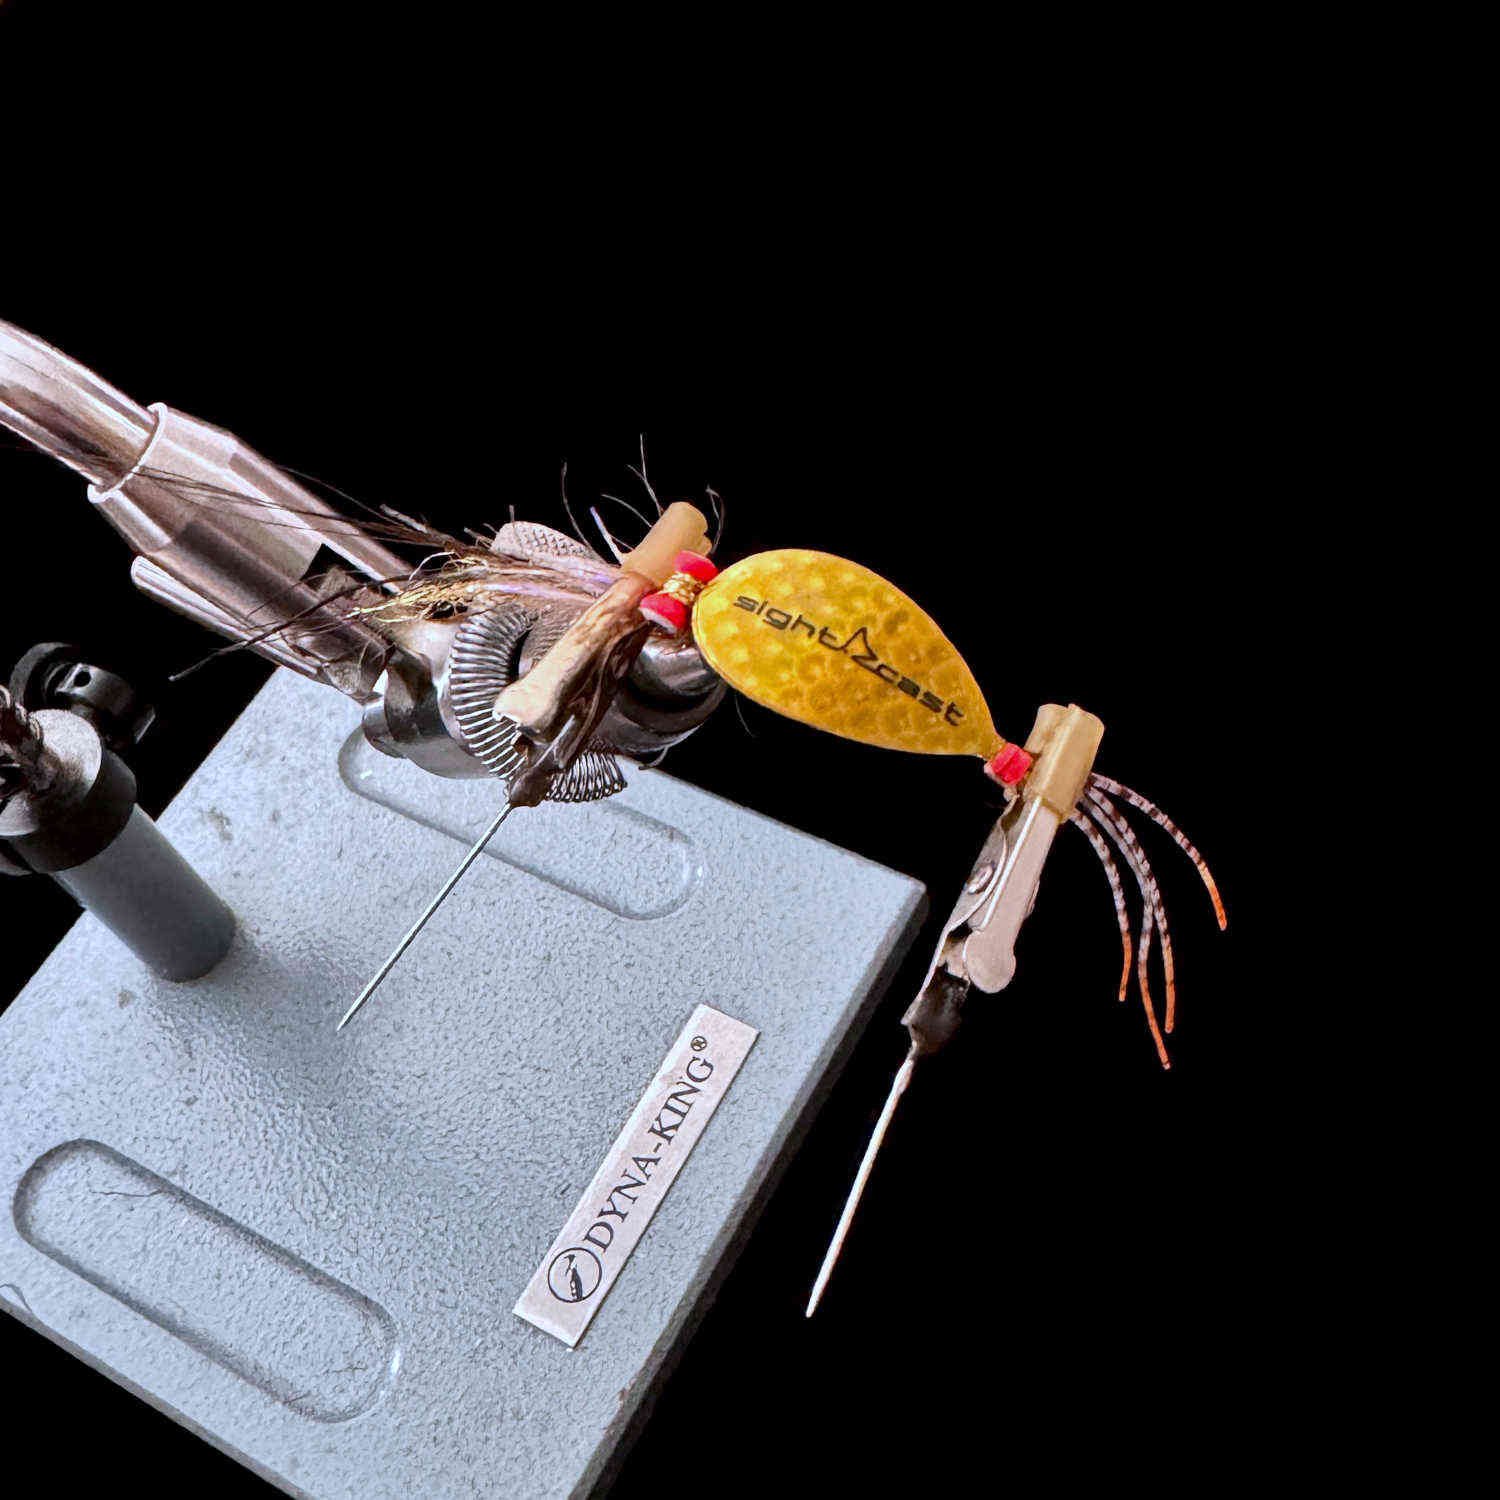
Now that the tying portion is done, it’s time to prepare the fly for epoxy.
First, trim any flash or fibers from the tail section that may interfere with the epoxy.
Then place two small clips on the fly as shown in the picture. One clip to hold the tail material out of the way and one clip to hold the Marsh Legs out of the way.
Step 14:
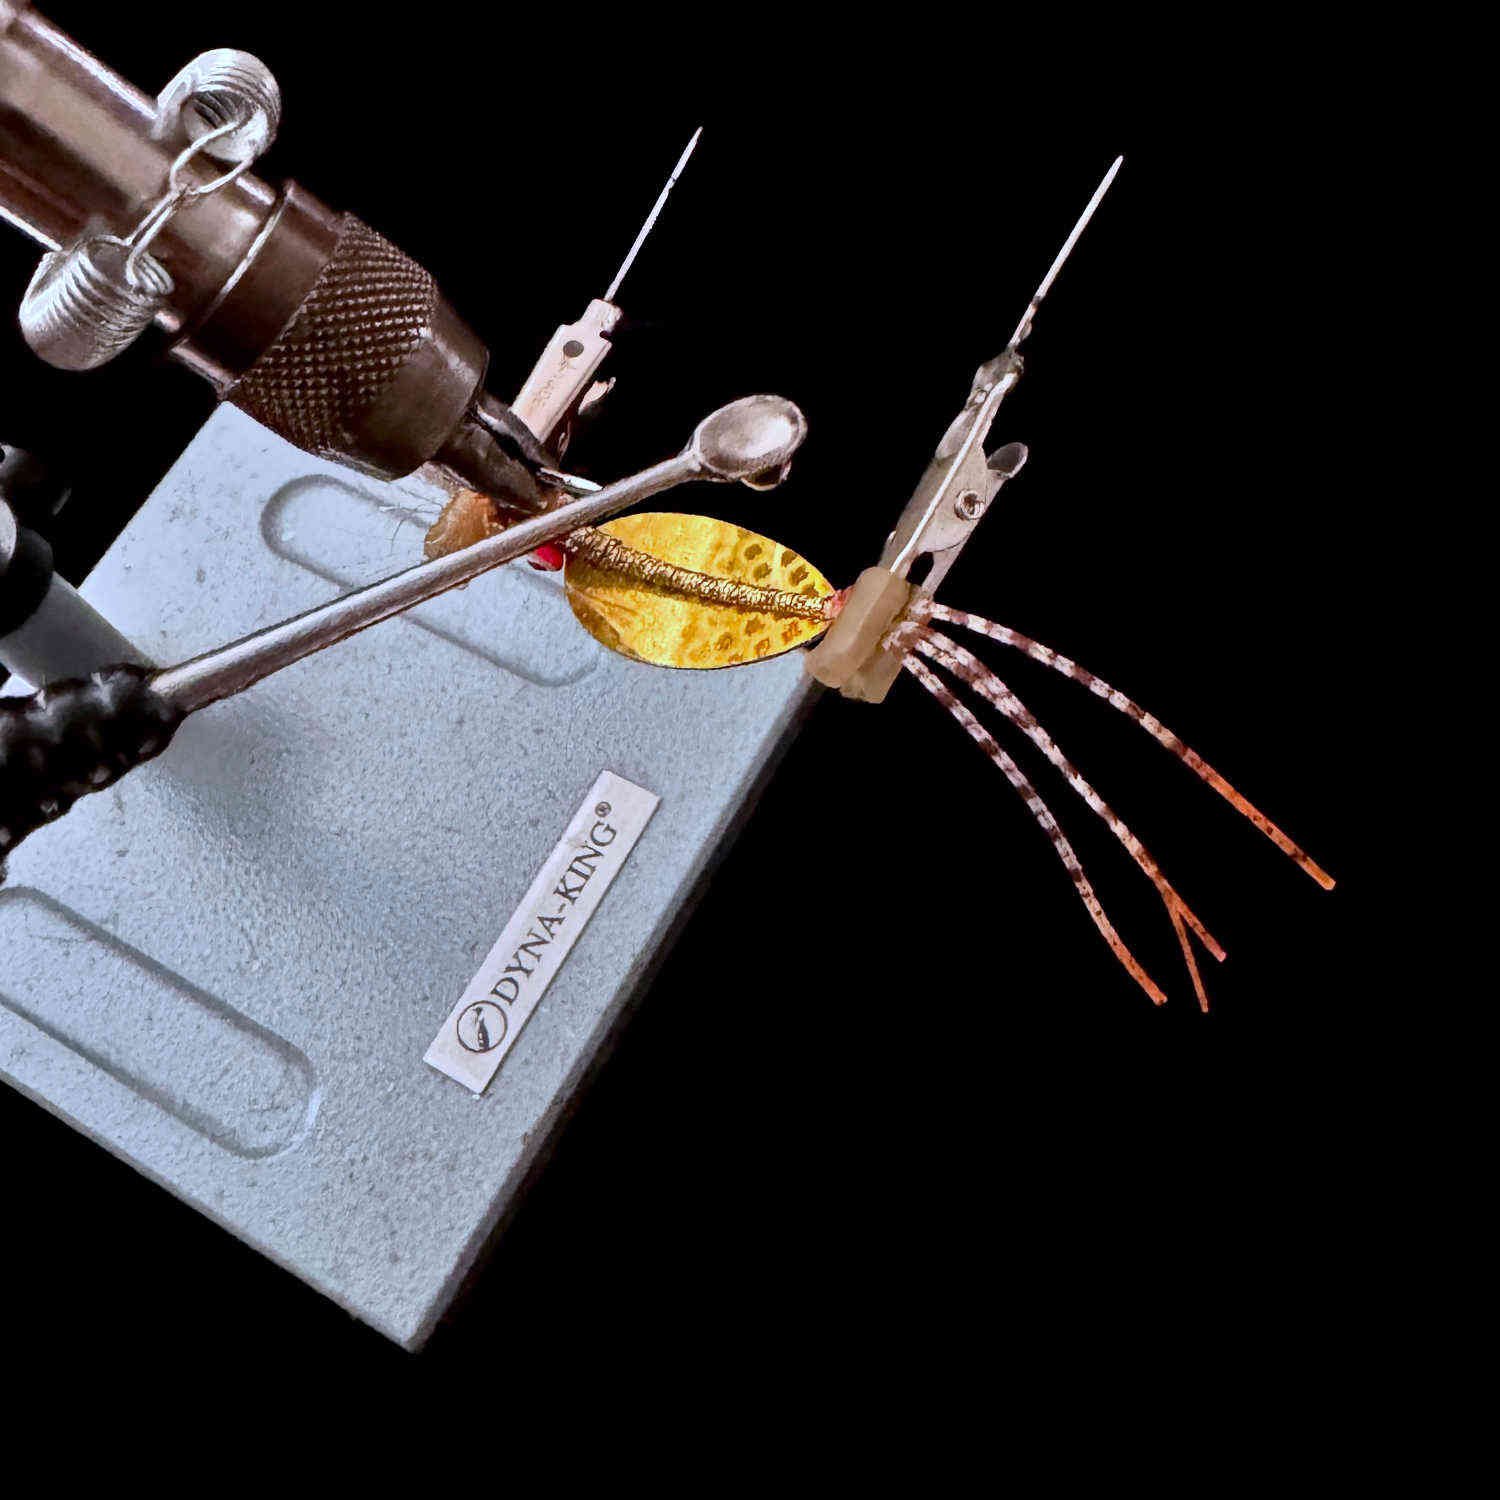
For maximum durability we recommend using Flex Coat Lure Gel epoxy to finish the fly. Mix up the two-part epoxy and cover both sides of the fly.
While applying the epoxy, and to prevent it from dripping, use a rotary vise to keep the fly rotating as the epoxy is applied.
For reference, we find that 2.5cc of each part epoxy (5cc total), will coat approximately 12 spoon flies.
A micro-sized spoon allows for precise application of any epoxy, resin, or glue you are applying to your flies. Just scoop a small amount of epoxy and use the back of the spoon to spread it out evenly.
Step 15:
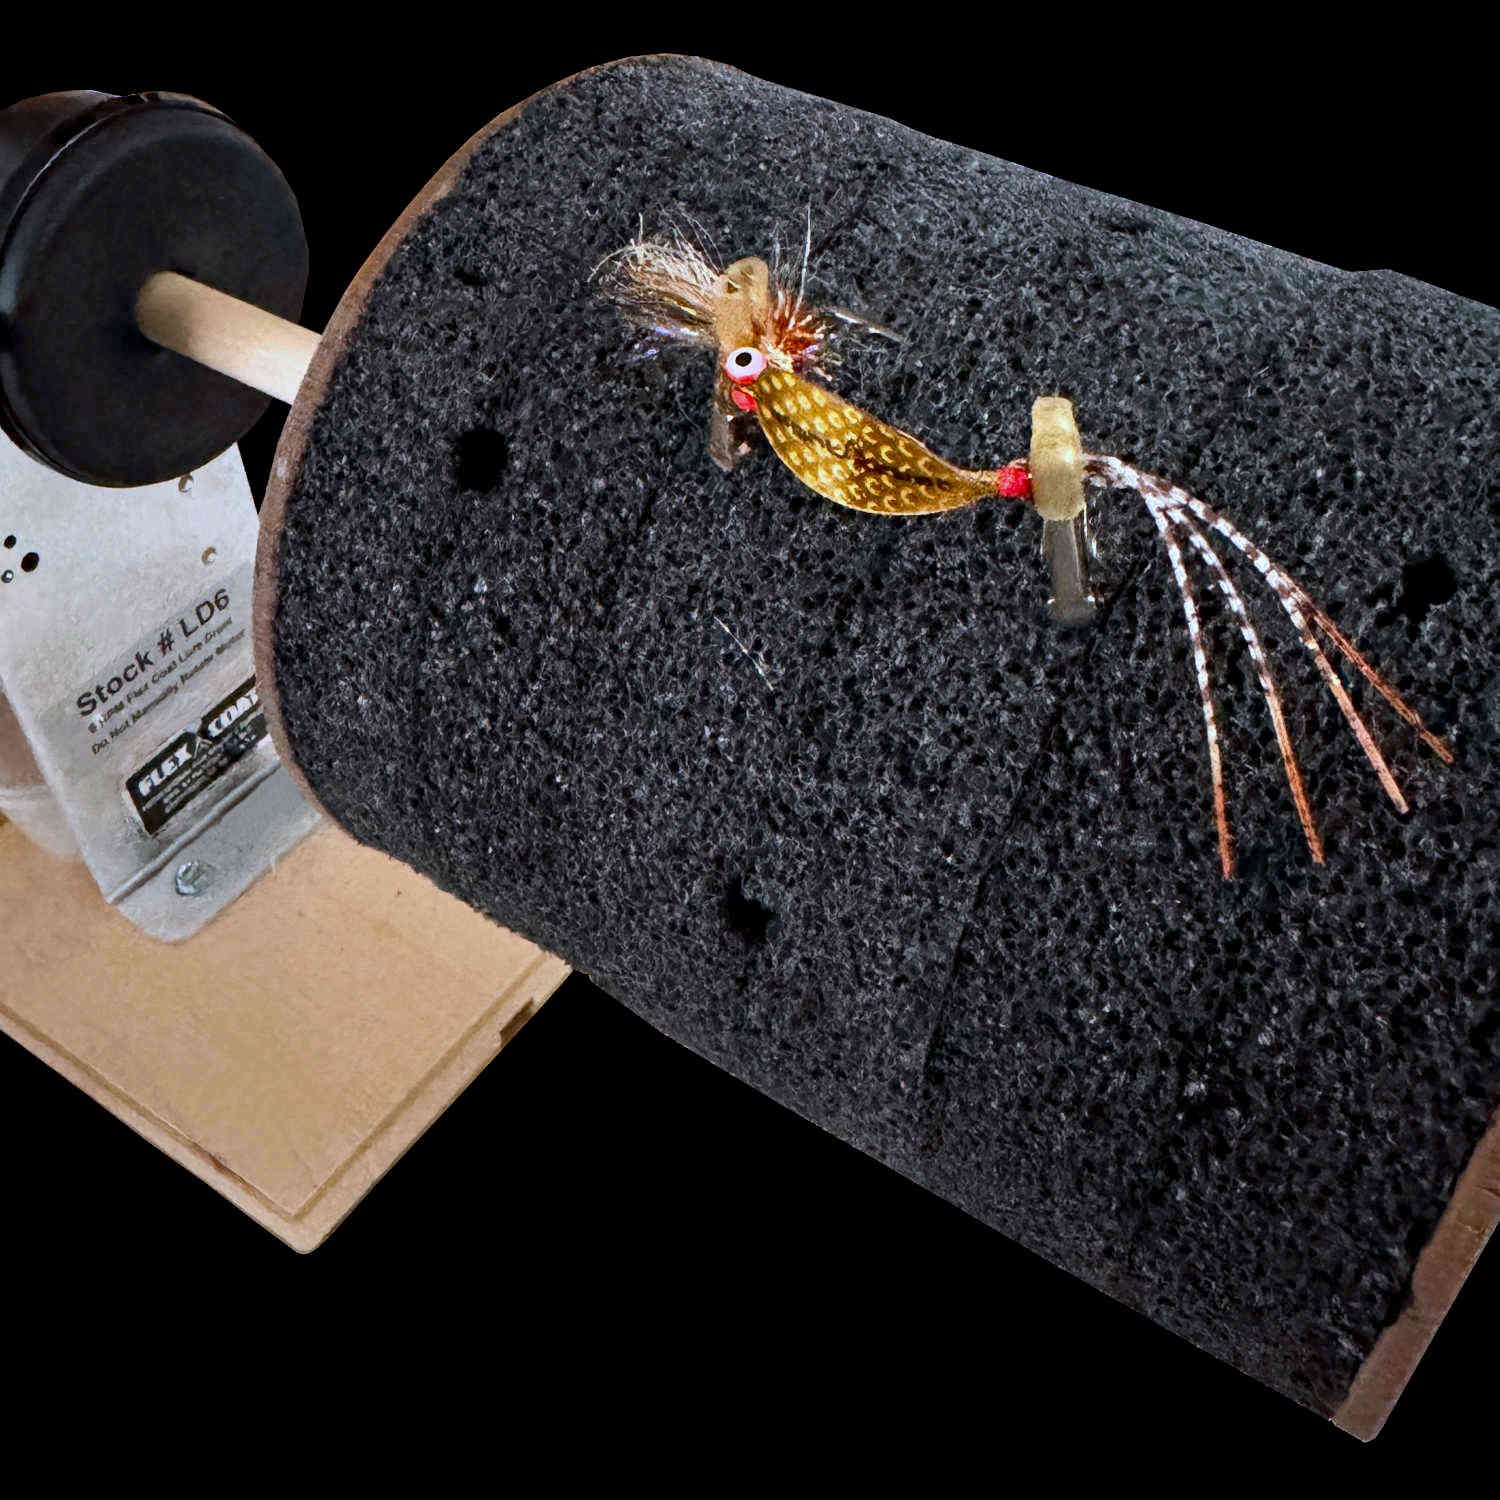
Remove the fly from the vise and place on a drying wheel.
Drying time is approximately 3 hours. Tack free in about 12 hours. Fully cured in 24 hours. We recommend to epoxy a handful of flies and and leave them on the drying wheel overnight.
If you’re in a hurry, you can opt to use some Solarez Thick UV Resin instead.
Finished:
The Shrimpadillo is a highly durable and effective Redfish fly. Just get it in front of the fish, pause your retrieve, and let the fly’s wobble on the descent work its magic.
See below for the recipes of six effective color combinations of the Shrimpadillo.
Gold
Hot Spot: Estaz Petite - Rootbeer
Tail: Faux Fox Fiber - Sand
Tail Flash: Ice Dub - Gold
Antennae: Shrimp Antennae - Black
Head: Moose Mane - Natural
Eyes: Hot Spot Lead Eyes - Orange
Collar: Crack Wrap - Sand
Spoon Body: Spoon Fly Cutouts - Gold/Gold
Body Flash: Holographic Flash - Gold
Legs: Marsh Legs - Gold/Brown - Orange Tip
Thread: SCFC Flat Waxed Nylon - Orange
Hook: Size 1 - SFH20 Spoon Fly Hook
Epoxy: Flex Coat Lure Gel
Silver
Hot Spot: Estaz Petite - Sand
Tail: Faux Fox Fiber - White
Tail Flash: Ice Dub - UV Pearl
Antennae: Shrimp Antennae - Black
Head: Moose Mane - Natural
Eyes: Hot Spot Lead Eyes - Blue
Collar: Crack Wrap - Sand
Spoon Body: Spoon Fly Cutouts - Silver/Pearl Backing
Body Flash: Holographic Flash - Silver
Legs: Marsh Legs - Sand/Brown - White Tip
Thread: SCFC Flat Waxed Nylon - Beige
Hook: Size 1 - SFH20 Spoon Fly Hook
Epoxy: Flex Coat Lure Gel
Copper/Bronze
Hot Spot: Estaz Petite - Rootbeer
Tail: Faux Fox Fiber - Light Brown
Tail Flash: Ice Dub - Golden Brown
Antennae: Shrimp Antennae - Black
Head: Moose Mane - Natural
Eyes: Hot Spot Lead Eyes - Black
Collar: Crack Wrap - Rootbeer
Spoon Body: Spoon Fly Cutouts - Copper/Dark Bronze
Body Flash: Holographic Flash - Copper
Legs: Marsh Legs - Copper/Brown - Orange Tip
Thread: SCFC Flat Waxed Nylon - Black
Hook: Size 1 - SFH20 Spoon Fly Hook
Epoxy: Flex Coat Lure Gel
Purple/Black
Hot Spot: Estaz Petite - Purple
Tail: Faux Fox Fiber - Black
Tail Flash: Ice Dub - UV Black
Antennae: Shrimp Antennae - Black
Head: Moose Mane - Natural
Eyes: Hot Spot Lead Eyes - Black
Collar: Crack Wrap - Purple
Spoon Body: Spoon Fly Cutouts - Purple/Black
Body Flash: Holographic Flash - Purple
Legs: Marsh Legs - Clear/Black - Purple Tip
Thread: SCFC Flat Waxed Nylon - Black
Hook: Size 1 - SFH20 Spoon Fly Hook
Epoxy: Flex Coat Lure Gel
Shrimp Pink
Hot Spot: Estaz Petite - White
Tail: Faux Fox Fiber - Shrimp Pink
Tail Flash: Ice Dub - UV Pearl
Antennae: Shrimp Antennae - Black
Head: Moose Mane - Natural
Eyes: Hot Spot Lead Eyes - White
Collar: Crack Wrap - Light Pink
Spoon Body: Spoon Fly Cutouts - Shrimp Pink/Silver
Body Flash: Holographic Flash - Pink
Legs: Marsh Legs - Sand/Brown - Shrimp Pink Tip
Thread: SCFC Flat Waxed Nylon - Shrimp Pink
Hook: Size 1 - SFH20 Spoon Fly Hook
Epoxy: Flex Coat Lure Gel
Chartreuse
Hot Spot: Estaz Petite - Chartreuse
Tail: Faux Fox Fiber - White
Tail Flash: Ice Dub - UV White
Antennae: Shrimp Antennae - Black
Head: Moose Mane - Natural
Eyes: Hot Spot Lead Eyes - White
Collar: Crack Wrap - Chartreuse
Spoon Body: Spoon Fly Cutouts - Chartreuse/Silver
Body Flash: Holographic Flash - Silver
Legs: Marsh Legs - Pearl/Brown - Chartreuse Tip
Thread: SCFC Flat Waxed Nylon - Chartreuse
Hook: Size 1 - SFH20 Spoon Fly Hook
Epoxy: Flex Coat Lure Gel
Sight Cast Fishing Company
We provide a line of products that are designed for those that live and breathe the shallow flats and backwater marshes. Our passion is saltwater fly fishing and we aim to provide top quality flies and fly tying materials designed for the Gulf Coast fly fisherman. Many of the materials used in this fly are available in the Tying Materials section of the website. You can also purchase this fly and many others that are already tied up and ready to fish in the Fly Shop. Good luck out there on the water!

